Collecting documents from borrowers is an important step on the loan journey, and Maxwell provides a place where borrowers can easily upload documents securely based on the tasks you assign. This article will touch on the different ways you can collect documents from your borrowers. This includes provide document tasks, custom tasks, and wet sign tasks.
For more information about managing documents that have been uploaded click here
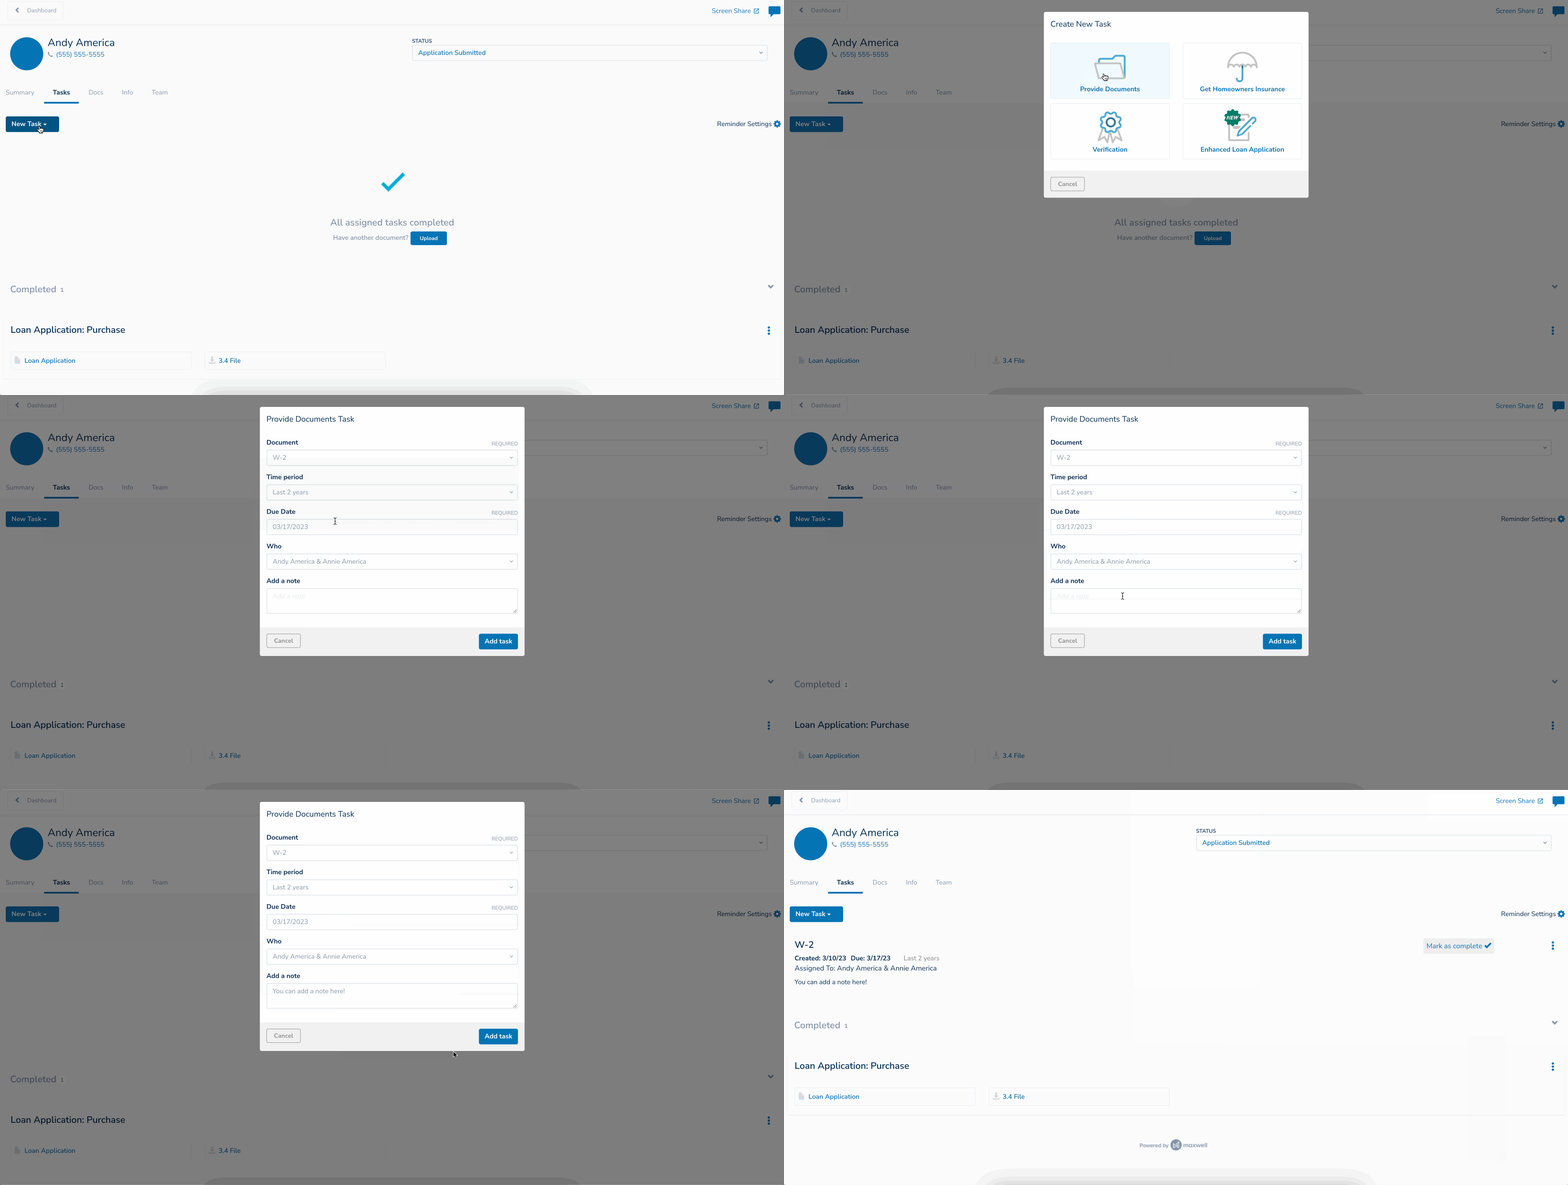
Provide Documents Task
Tasks are the main source of document collection in Maxwell and the Provide Documents task is the mosta commonly used. When creating a Provide Documents task, you will see a wide range of document types to choose from and the ability to create custom tasks.

- From your dashboard, click on the borrower's name on loan file you want to create a document collection task for.
- Navigate to the Tasks tab of the file
- Click “New Task” → “Add Task” → “Provide Documents”
- Select the type of document
- Select the Time Period of request documents, if applicable (ex. two years for W2s, two months for bank statements, etc.)
- Select desired due date for task to be completed
- Select which borrowers will receive the task. You can select one or both borrowers. (If borrowers do not share finances they will receive separate tasks)
- (Optional) Add a note on the task for the borrower
- Click blue “Add Task” button
Note: Bank statement, W2, and Paystub tasks gives borrowers the option to link their accounts to have statements automatically imported! This is only available from the borrower's view.
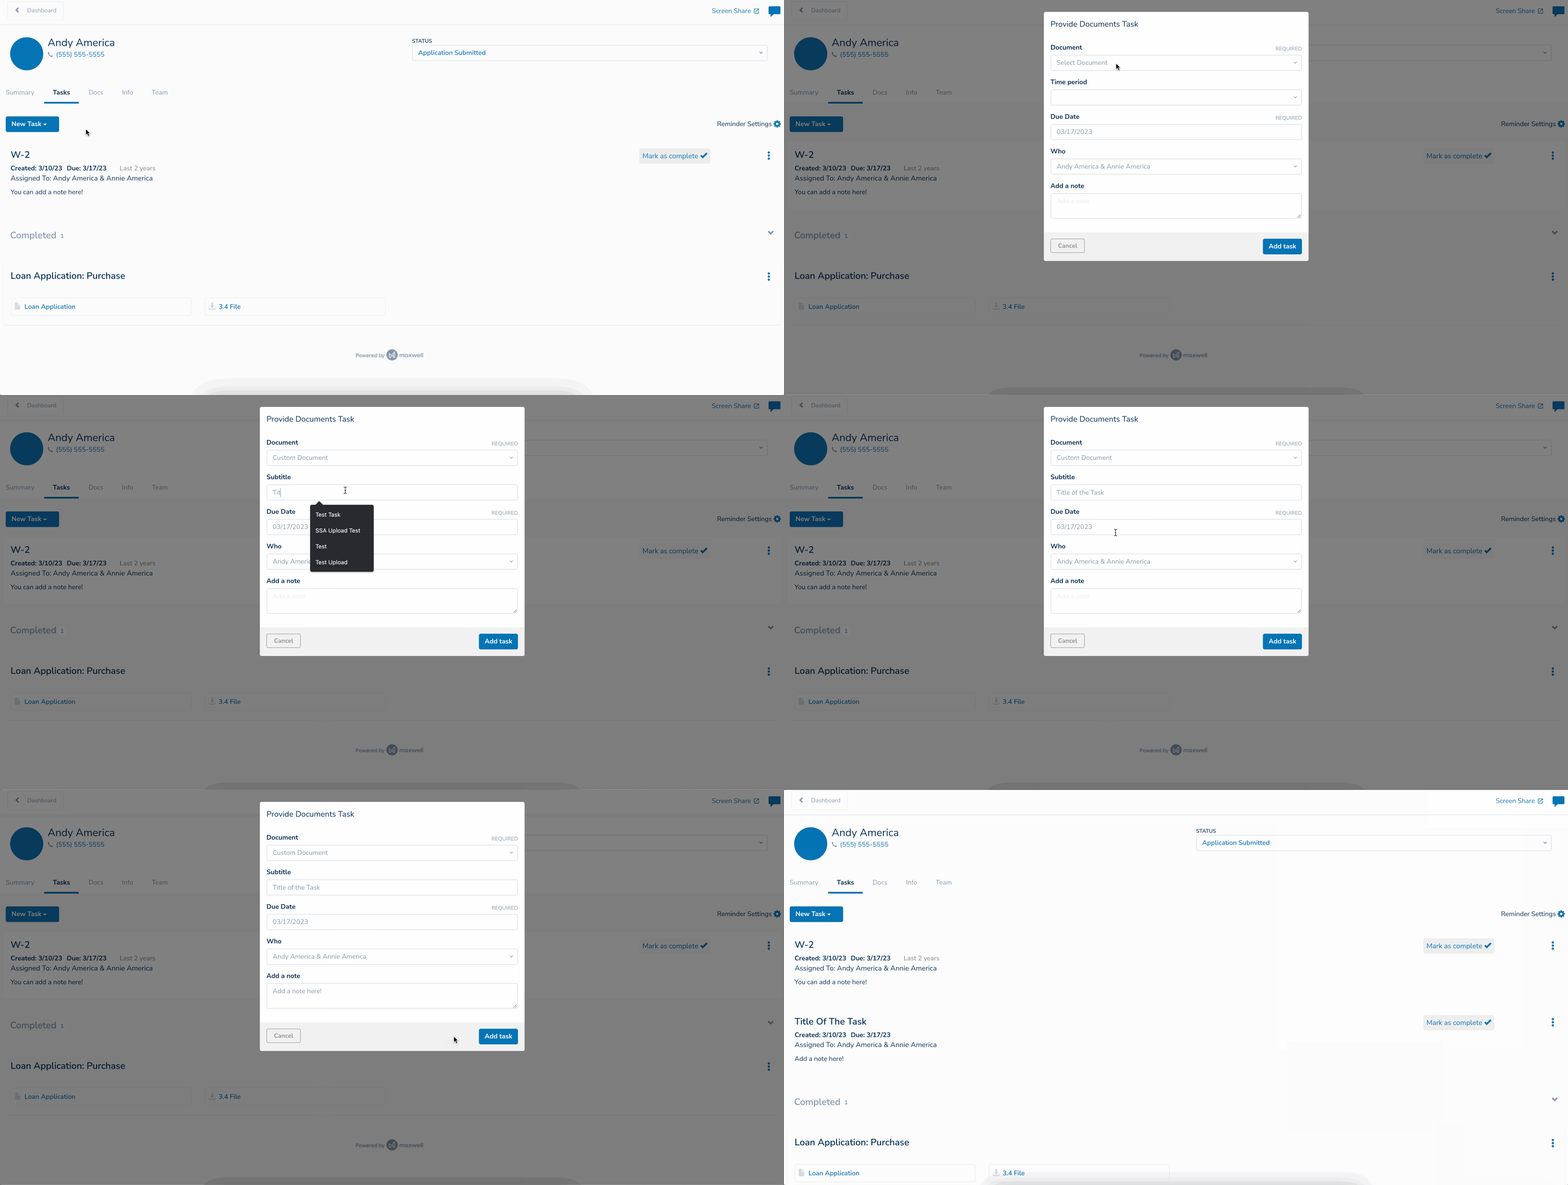
Custom Document Tasks
Custom document tasks allow you to create your own type of task. This is a good option for documents types that may not be included in the drop down list. This can also be used for wet sign tasks where the borrower needs to download a document, sign it, and re-upload to Maxwell.

- From your dashboard, click on the borrower's name on loan file you want to create a document collection task for.
- Navigate to the Tasks tab of the file
- Click “New Task” → “Add Task” → “Provide Documents”
- Click “Select Document” drop down.
- Select Custom Document (second one from the bottom)
- Type in a Subtitle for you custom task (This can be anything and will display as the task title)
- Select the desired due date for the task
- Select which borrowers will receive the task. You can select one or both borrowers. (If borrowers do not share finances they will receive separate tasks)
- (Optional) Add a note on the task for the borrower
- Click blue “Add Task” button
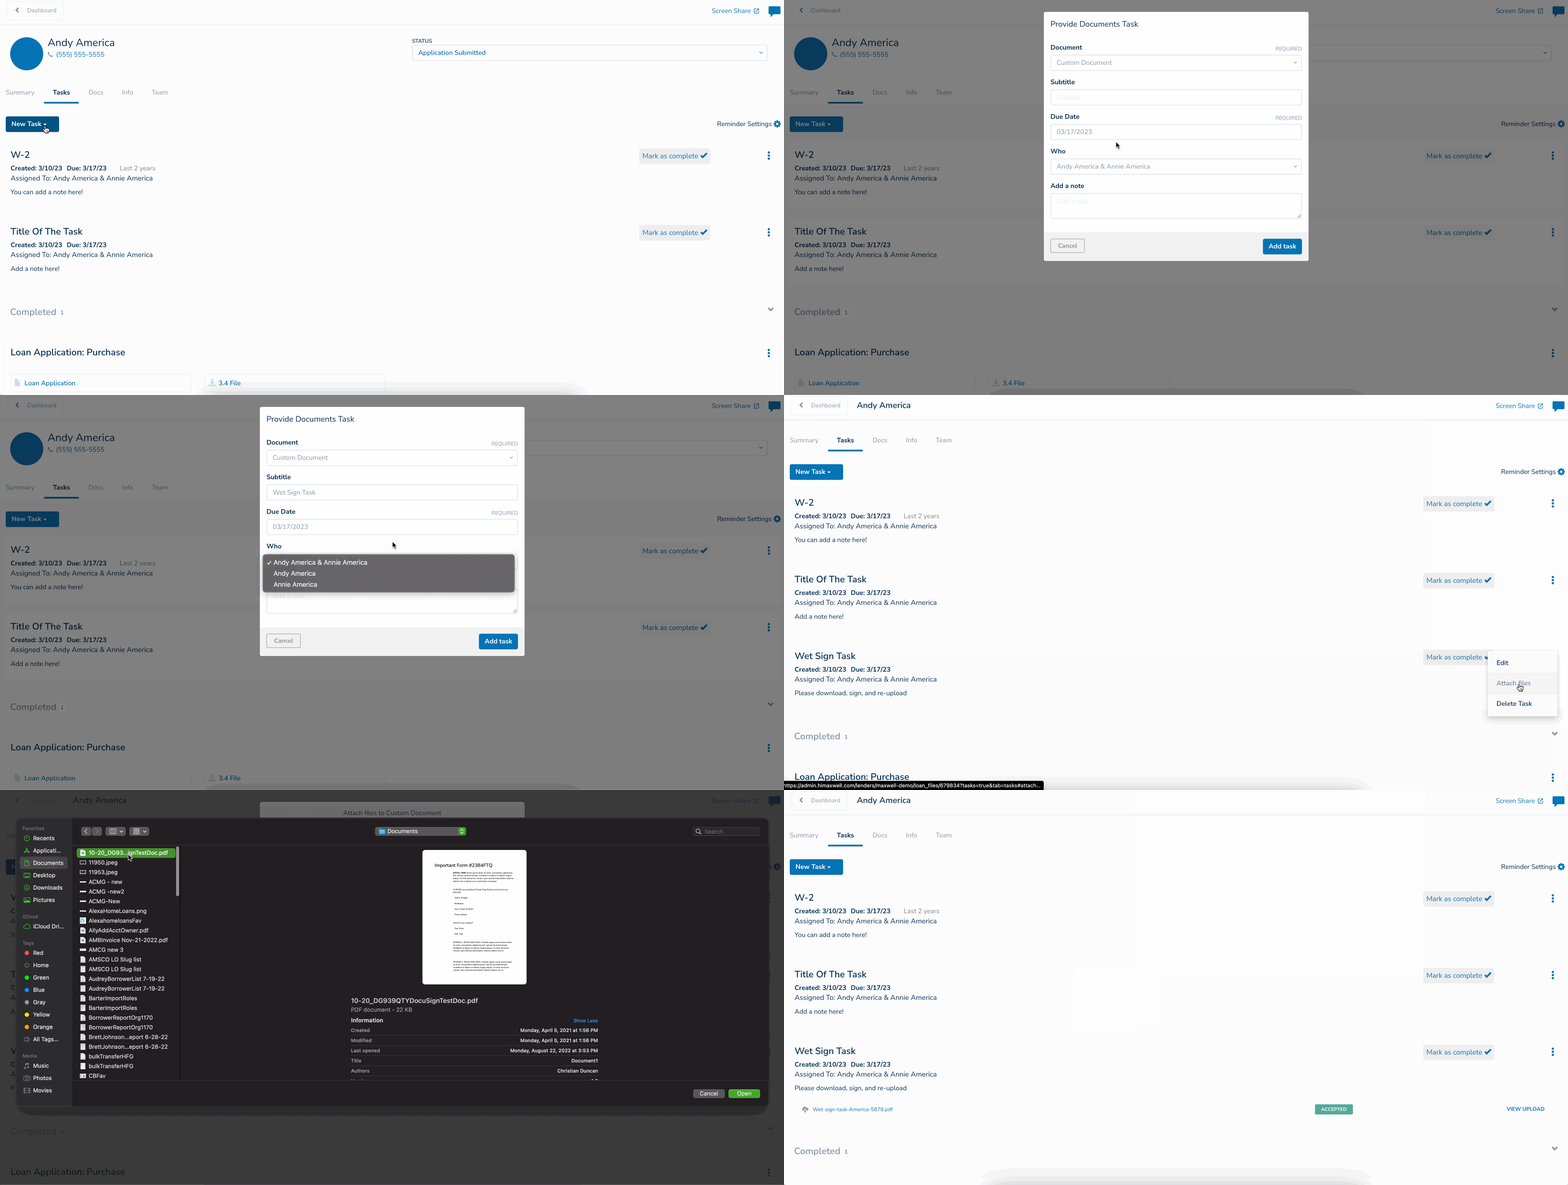
Wet Sign Tasks
There are times when you may need to request a document to be wet signed by your borrower. Don’t worry, this can still be accomplished with Maxwell with custom tasks! The borrower can download the document you upload to the custom task, sign it, then re-upload it directly to the same task.

- From your dashboard, click on the borrower's name on loan file you want to create a wet sign task for.
- Navigate to the Tasks tab of the file
- Click “New Task” → “Add Task” → “Provide Documents”
- Click “Select Document” drop down.
- Select Custom Document (second one from the bottom)
- Type in a Subtitle for the wet sign task (This can be anything and will display as the task title)
- Select the desired due date for the task
- Select which borrowers will receive the task. You can select one or both borrowers. (If borrowers do not share finances they will receive separate tasks)
- Add a note so the borrower knows what steps to take, like “Please download this document, sign, and upload the signed copy to this task."
- Click blue “Add Task” button
- Click three dots to the right of the task → click "Attach Files" and upload the document the borrower needs to sign.