Now that you've added tasks, and your borrower has uploaded the corresponding documents, it's time to review the documents, and if everything is in order, mark the task as completed. Completed tasks mean that your borrower can rest easy knowing that their documents are being reviewed, and you'll be able to move even more quickly to get this loan closer to closing!
For more information on collecting documents click here.
Reviewing documents in the DocVault
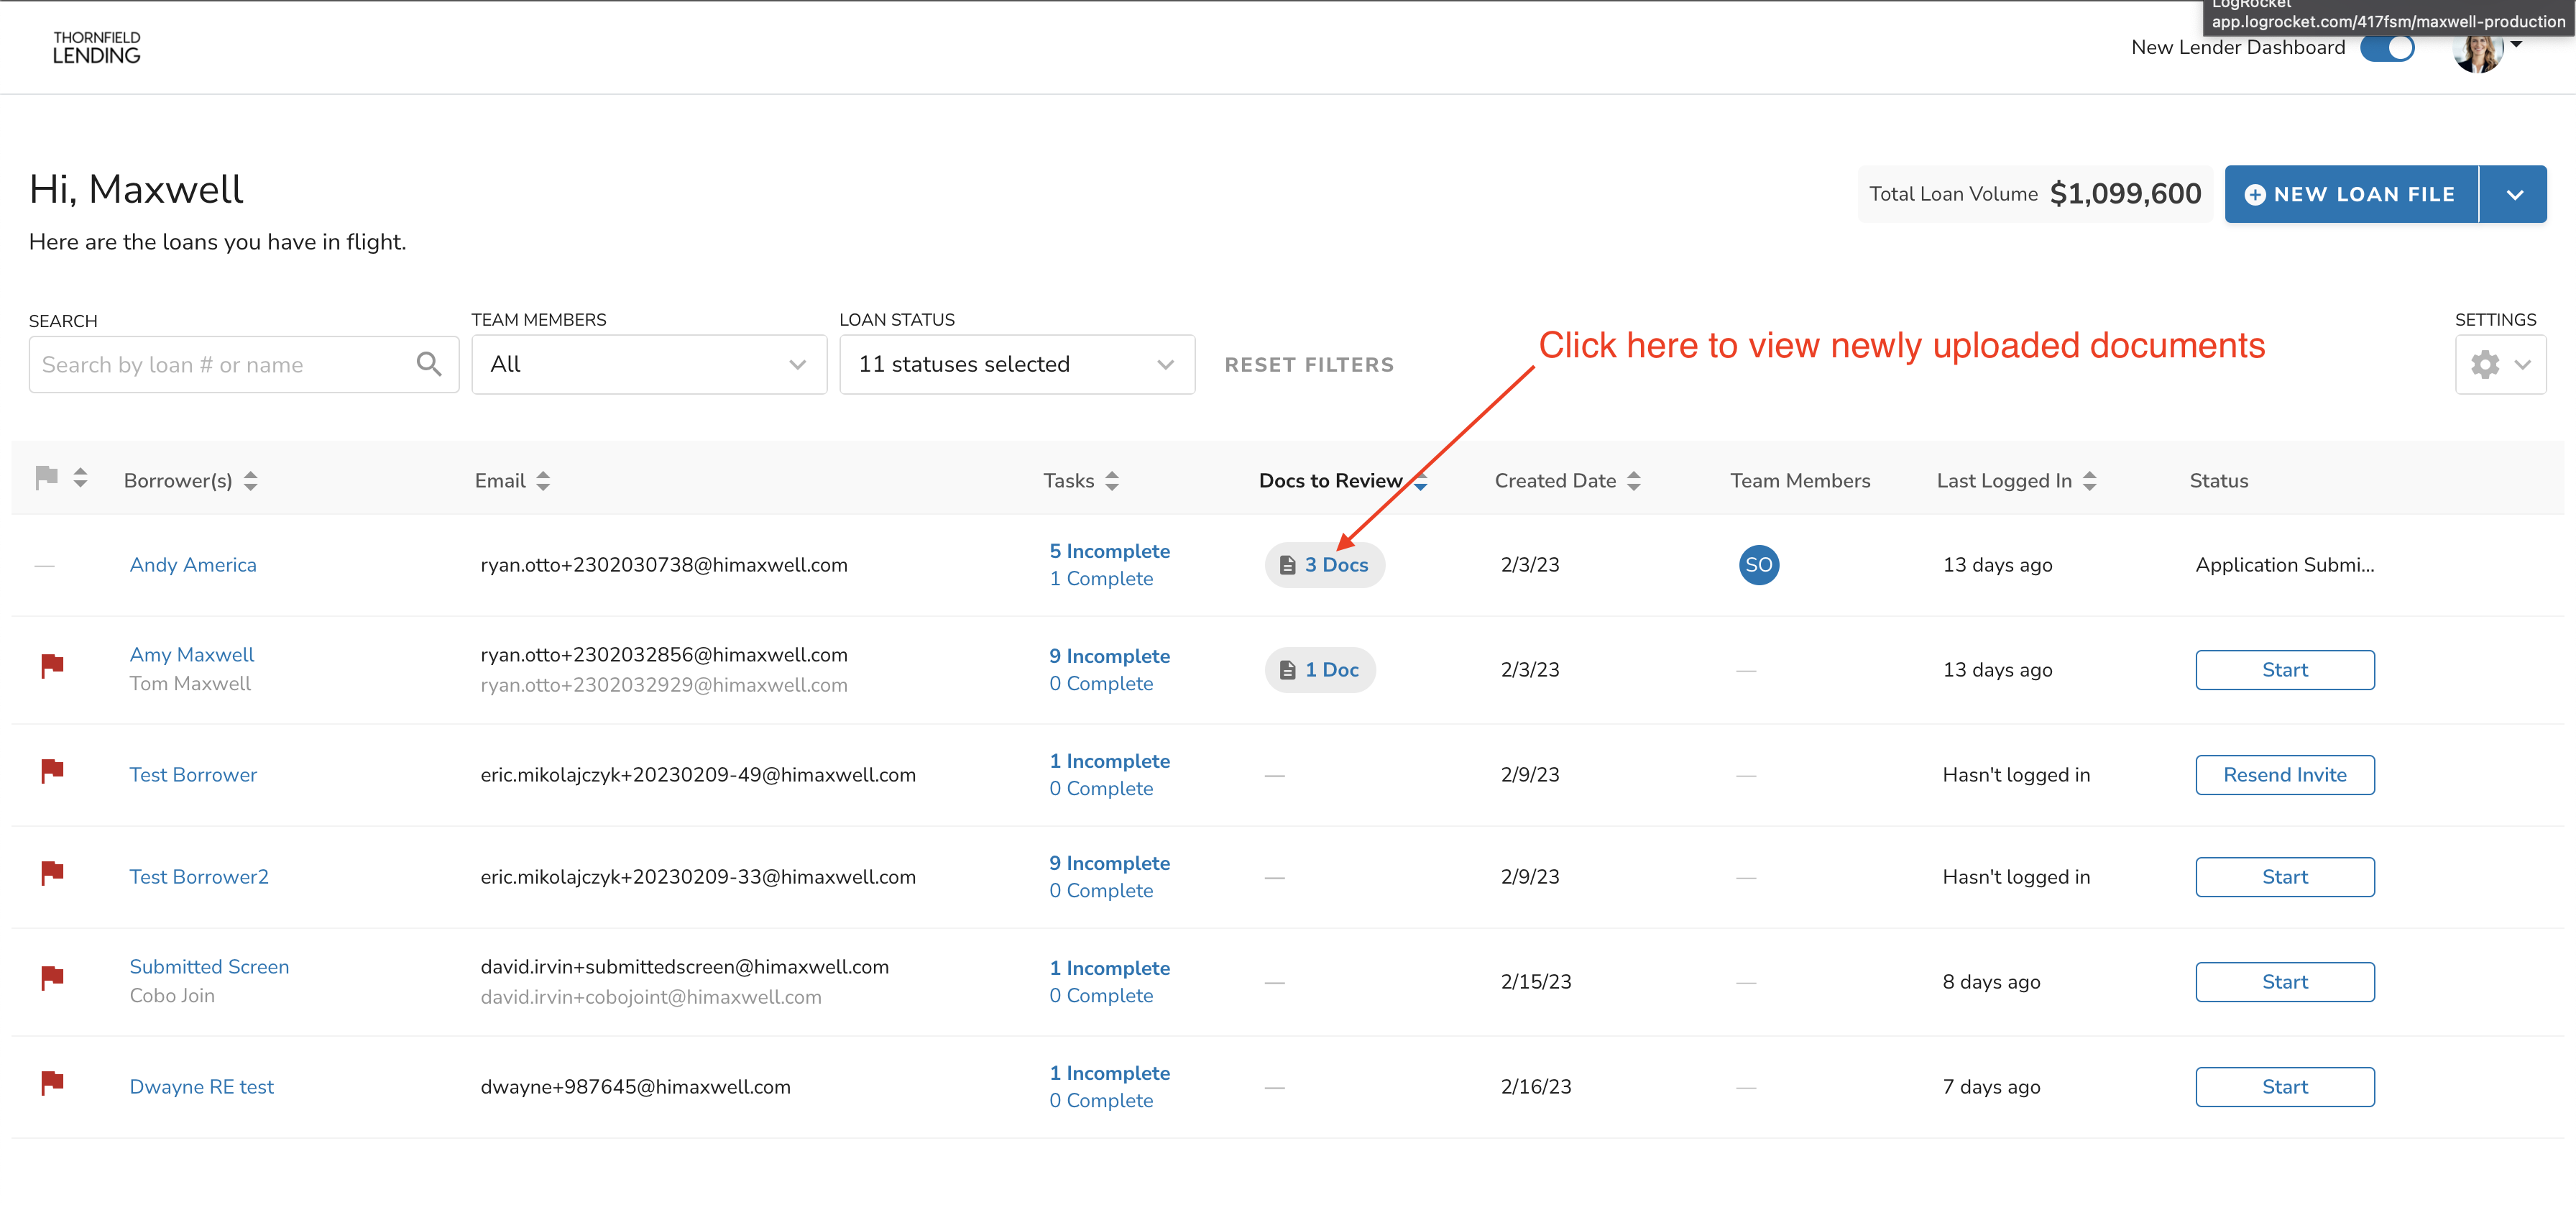
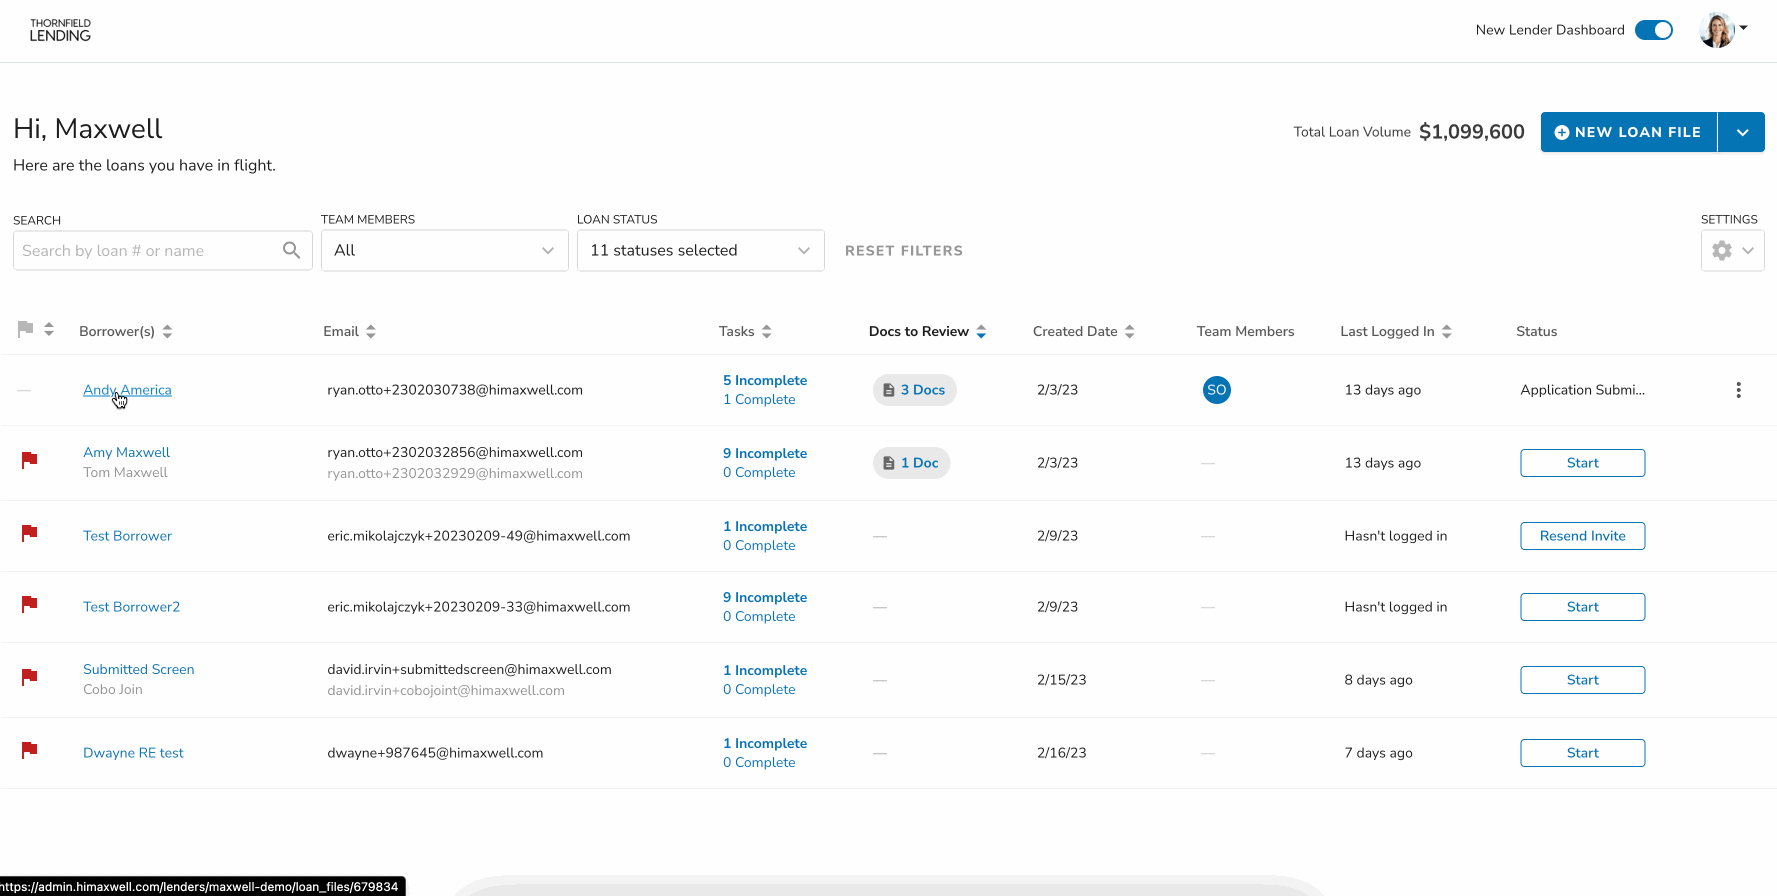
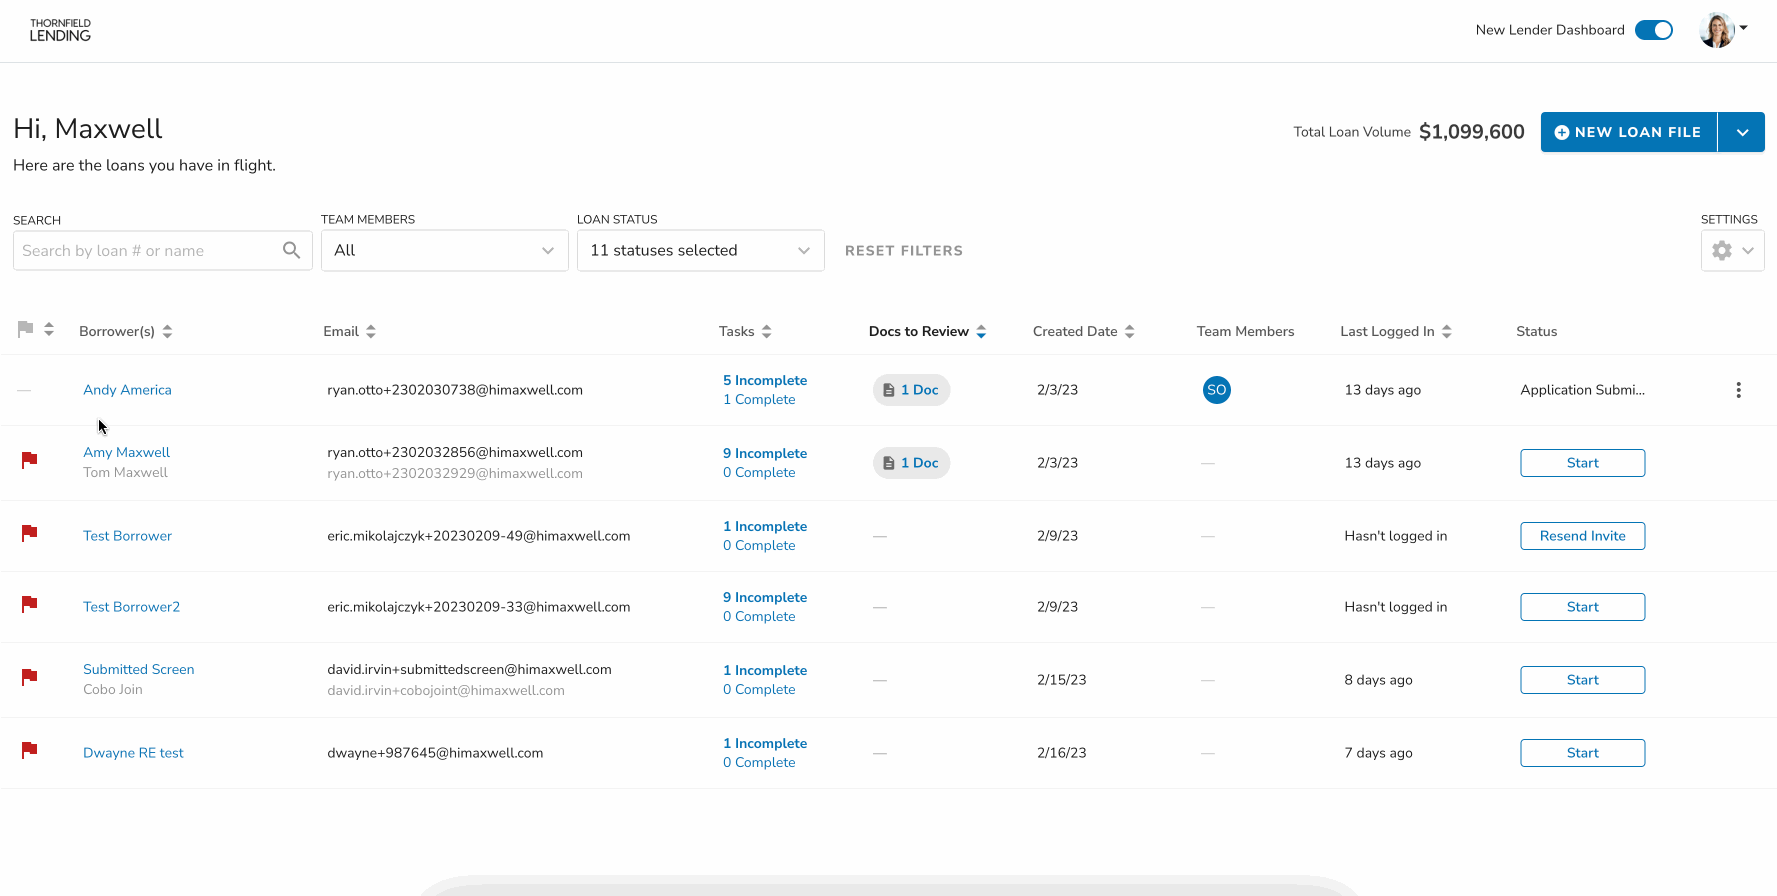
Your clients are all listed on your dashboard. When there are documents to review, they'll be listed next to the client name under the "Docs To Review" column on your dashboard. Click on the borrower name to open up the file or click on the “# Docs” under the Docs To Review column to be directed to the Docs tab.
As documents are uploaded to each task, the documents will be stored in two places: the task list and the document vault. Click on the 'Docs' tab to open the Document Vault to view all of the documents in a client's file. You can sort this list by file name, task type, status, and upload date.
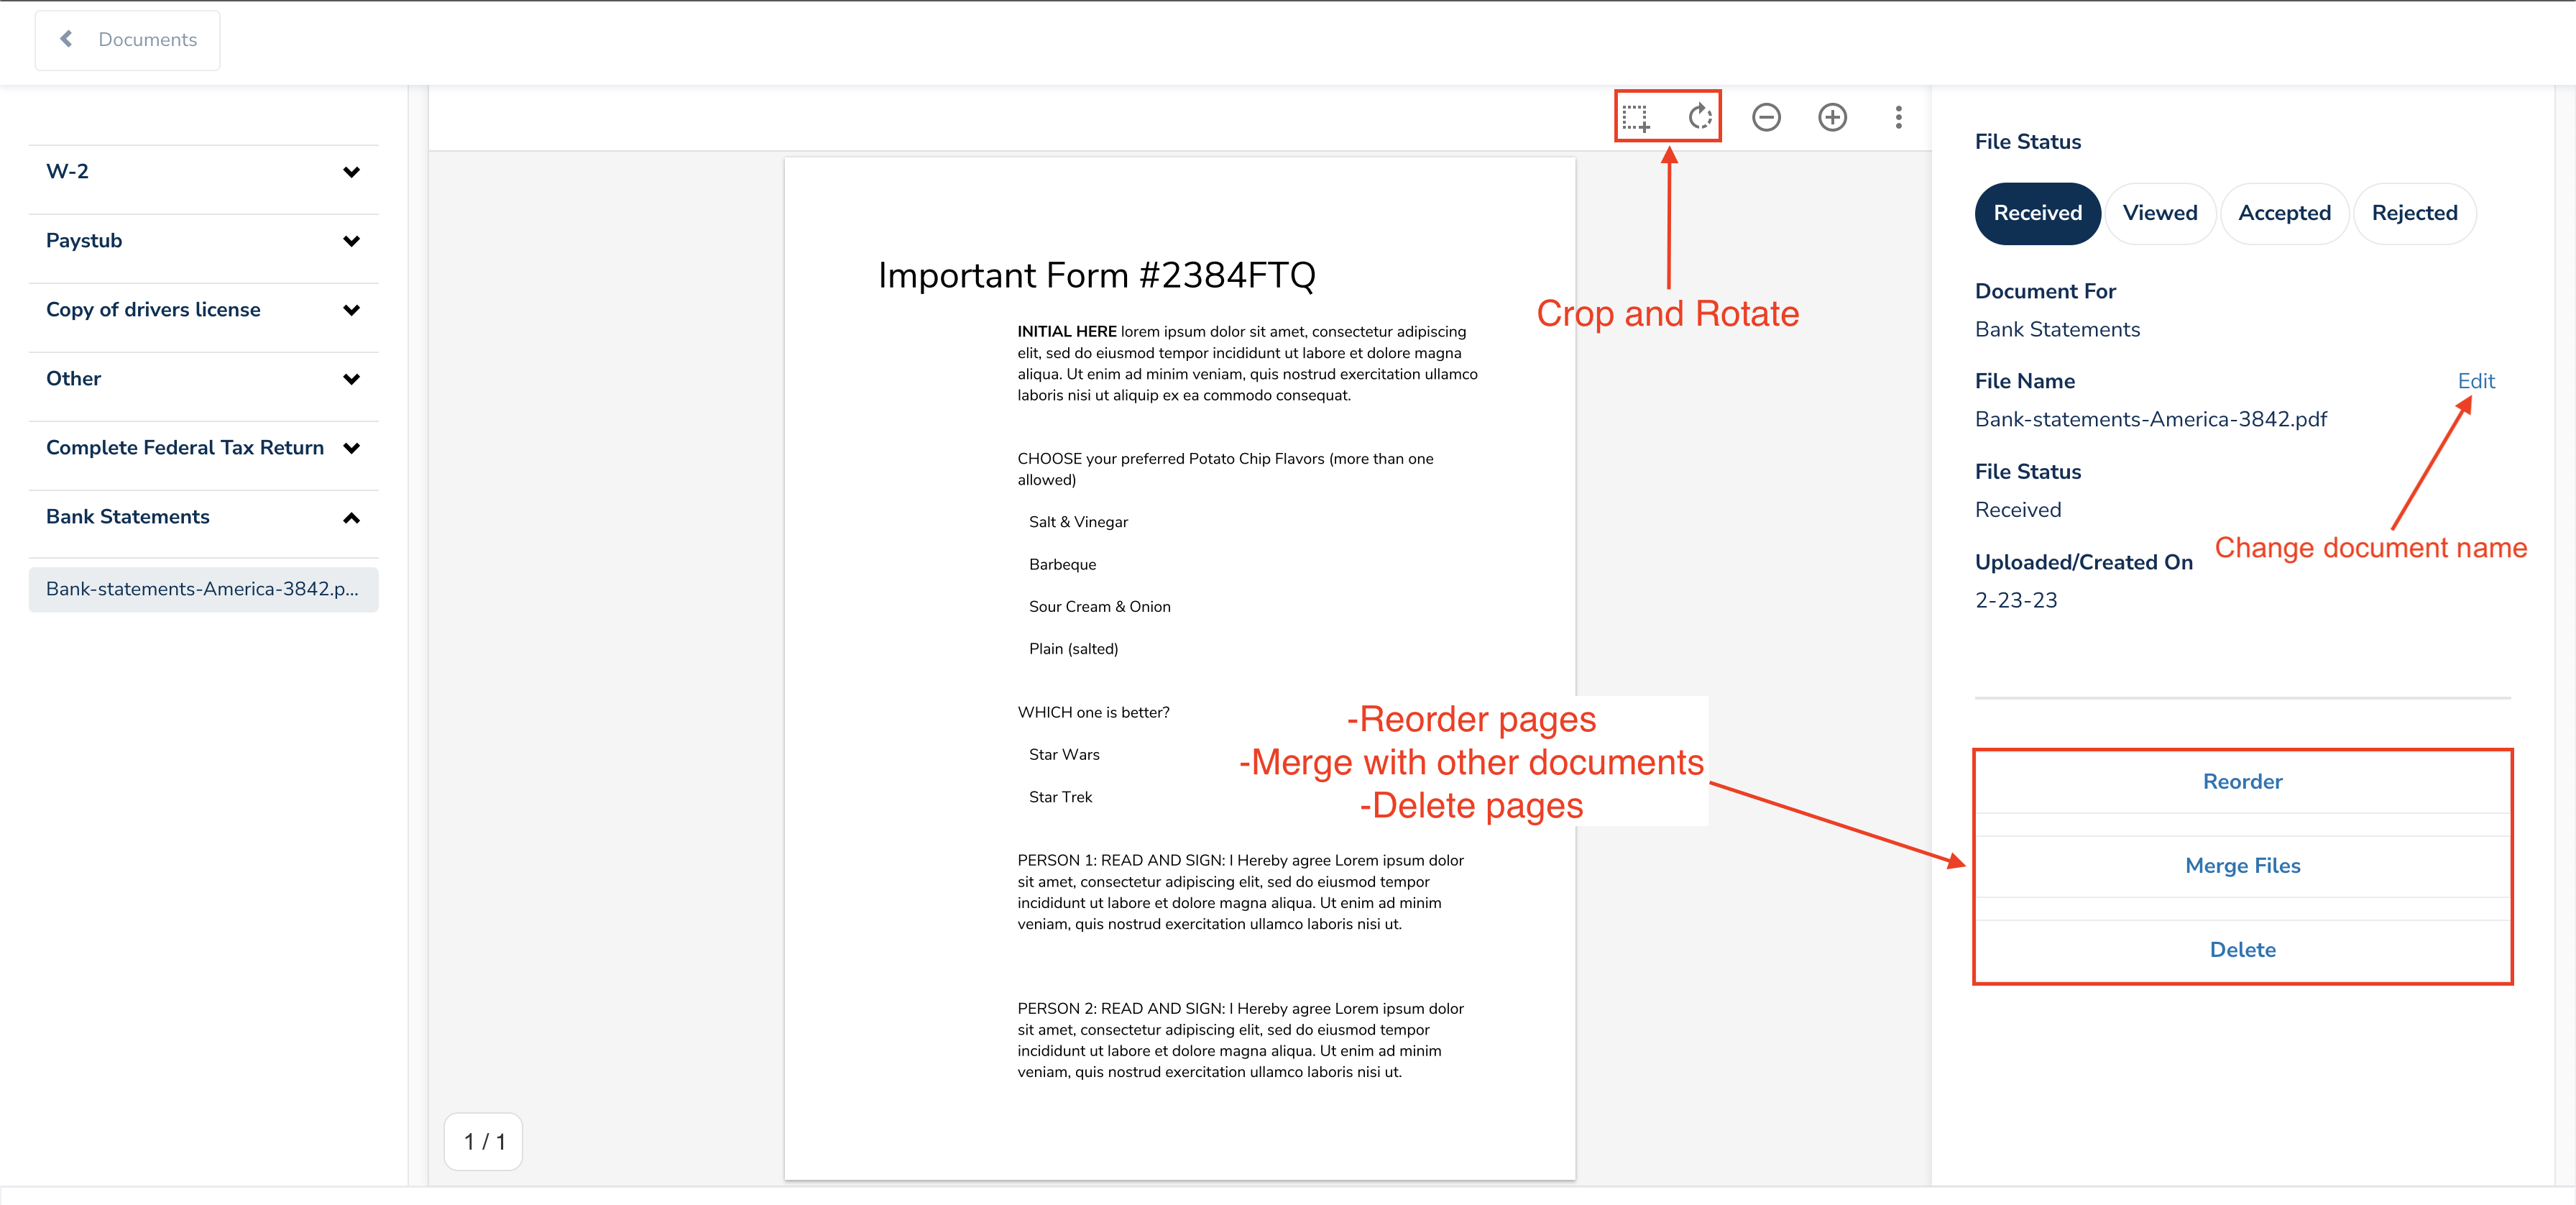
There will also be a document status associated: Received, Viewed, Accepted, or Rejected. Click on the document name to view the document, and either accept the document, or reject it. There is also a Viewed status that marks someone has seen the document but has not accepted/rejected it yet. If you have an LOS connection that syncs documents when they are marked Accepted, you can use the Viewed status to let the borrower know you've looked at the file, and keep the document from syncing to the LOS
If you reject it a document, Maxwell will give you the option of to provide a reason to the borrower for the rejection. This will send an email notification to the borrower with your message.
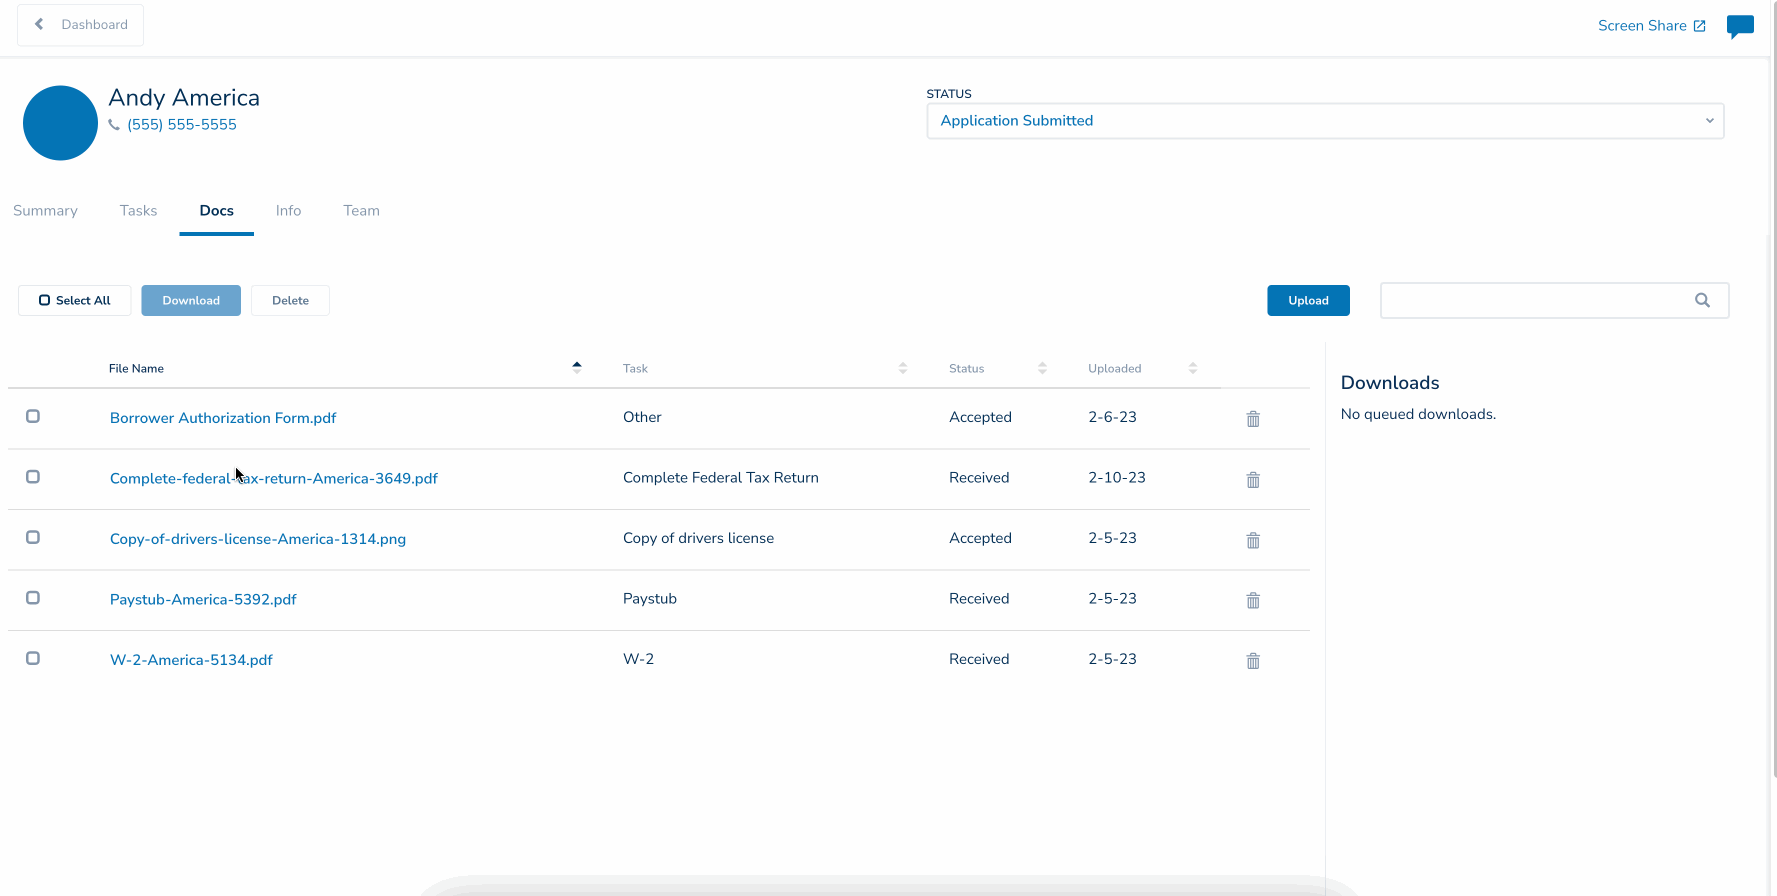
Document Statuses
| Status | Description |
| Received | When a document is uploaded by the borrower it is marked as "Received" |
| Viewed | Docs that a member of the Lending team viewed, but are not yet ready to Accept or Reject. Organizations that sync only Accepted documents to the LOS can use this status to let a borrower know the document has been viewed. In this case, docs marked as Viewed will not sync to the LOS. |
| Accepted | Docs that are reviewed and approved by a lending team that are ready for underwriting. |
| Rejected | Documents that do not meet requirements for underwriting. |
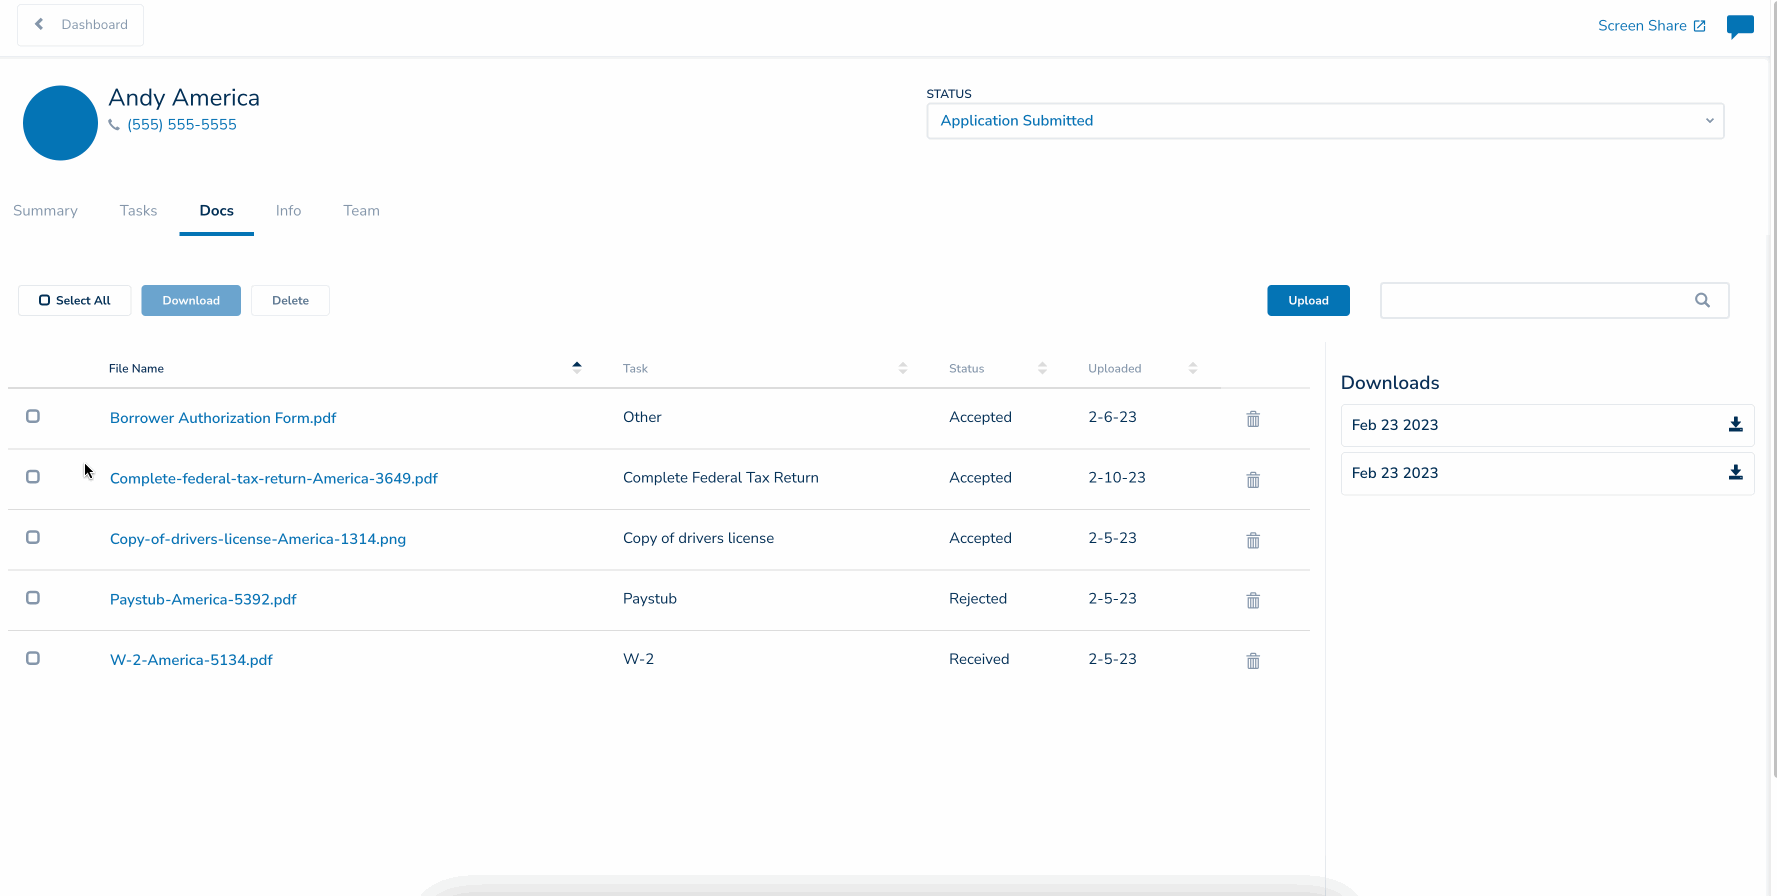
Downloading Documents
You can download borrower documents from the Docs tab. This will allow you upload to long term storage, your LOS, or other destinations. Documents can be downloaded individually, or in bulk.
All documents downloaded from Maxwell will be downloaded as a zip file. To download documents from Maxwell, follow these steps:
- From your dashboard, click on the name of the client your want to download documents for, then navigate to the Docs tab.
- Click check boxes next to the document(s) you want to download (if all docs are desired, use the “Select All” button at the top).
- Click the blue Download button
The download will begin on the right side of the page. When completed, click the link at the top of the Downloads list to save the zip file.
Sending Documents to Borrowers
Maxwell isn't a one-way street for secure document collection! You may have a document you need to share with your borrower, or you received a document through a different channel and want to keep it organized in your client's Maxwell file. You can add documents to tasks, send them via messaging, and upload directly to the document list in the Docs tab.
Attach Documents to Tasks
There may be a time where you need to upload a document for a borrower to a task. Maxwell allows for this using the three dot menu to the right of the task.
- From your dashboard, click on the borrower's name to open their file.
- Click on the Tasks tab and locate the task to upload a document
- Click the three dots to the right of the task
- Click Attach Files
- Click inside the dotted box to choose a file, or drag/drop the document inside of the dotted box.
- Click Upload Document

Note: The new document will show in the Accepted status, as Maxwell assumes that you wouldn't attach the document there unless you wanted it there!
Attach Documents to Messaging
You can also attach documents via the Messaging window in the loan file. Use this feature if you want to include a message or explanation of the document you're providing to your borrower. Uploading via the messages tab will place the document into the Document Vault.
- From your dashboard, click on the name of the borrower to open their file.
- Click the blue chat bubble icon in the top right hand corner (if messaging window is not already open).
- Click the paperclip icon at the bottom left of the messaging window
- Click inside the dotted box to choose a file, or drag/drop the document inside of the dotted box
- Add a message if desired, then click Attach
Your borrower will receive a notification that a new message has been sent to him or her in Maxwell, and when they log in they'll be able to view the document.
Note: Any documents uploaded to the messages window will be classified as “Other” since they were not uploaded to a task.
DocTools
When you're collecting hundreds of documents a month, using multiple systems to get them ready for submission can really add a lot of time to your day. Instead of using a third party tool, DocTools allows you to:
- Crop
- Rotate
- Merge
- Rename
- Edit
- Delete Pages
All of these features right within the document vault! This feature is included for all Maxwell POS users.
File Types Accepted for Upload
Wondering what kind of files your borrowers can upload? These are the file types supported for upload!
- doc
- docx
- csv
- jpeg
- jpg
- png
- svg
- txt
- zip
- xlsx