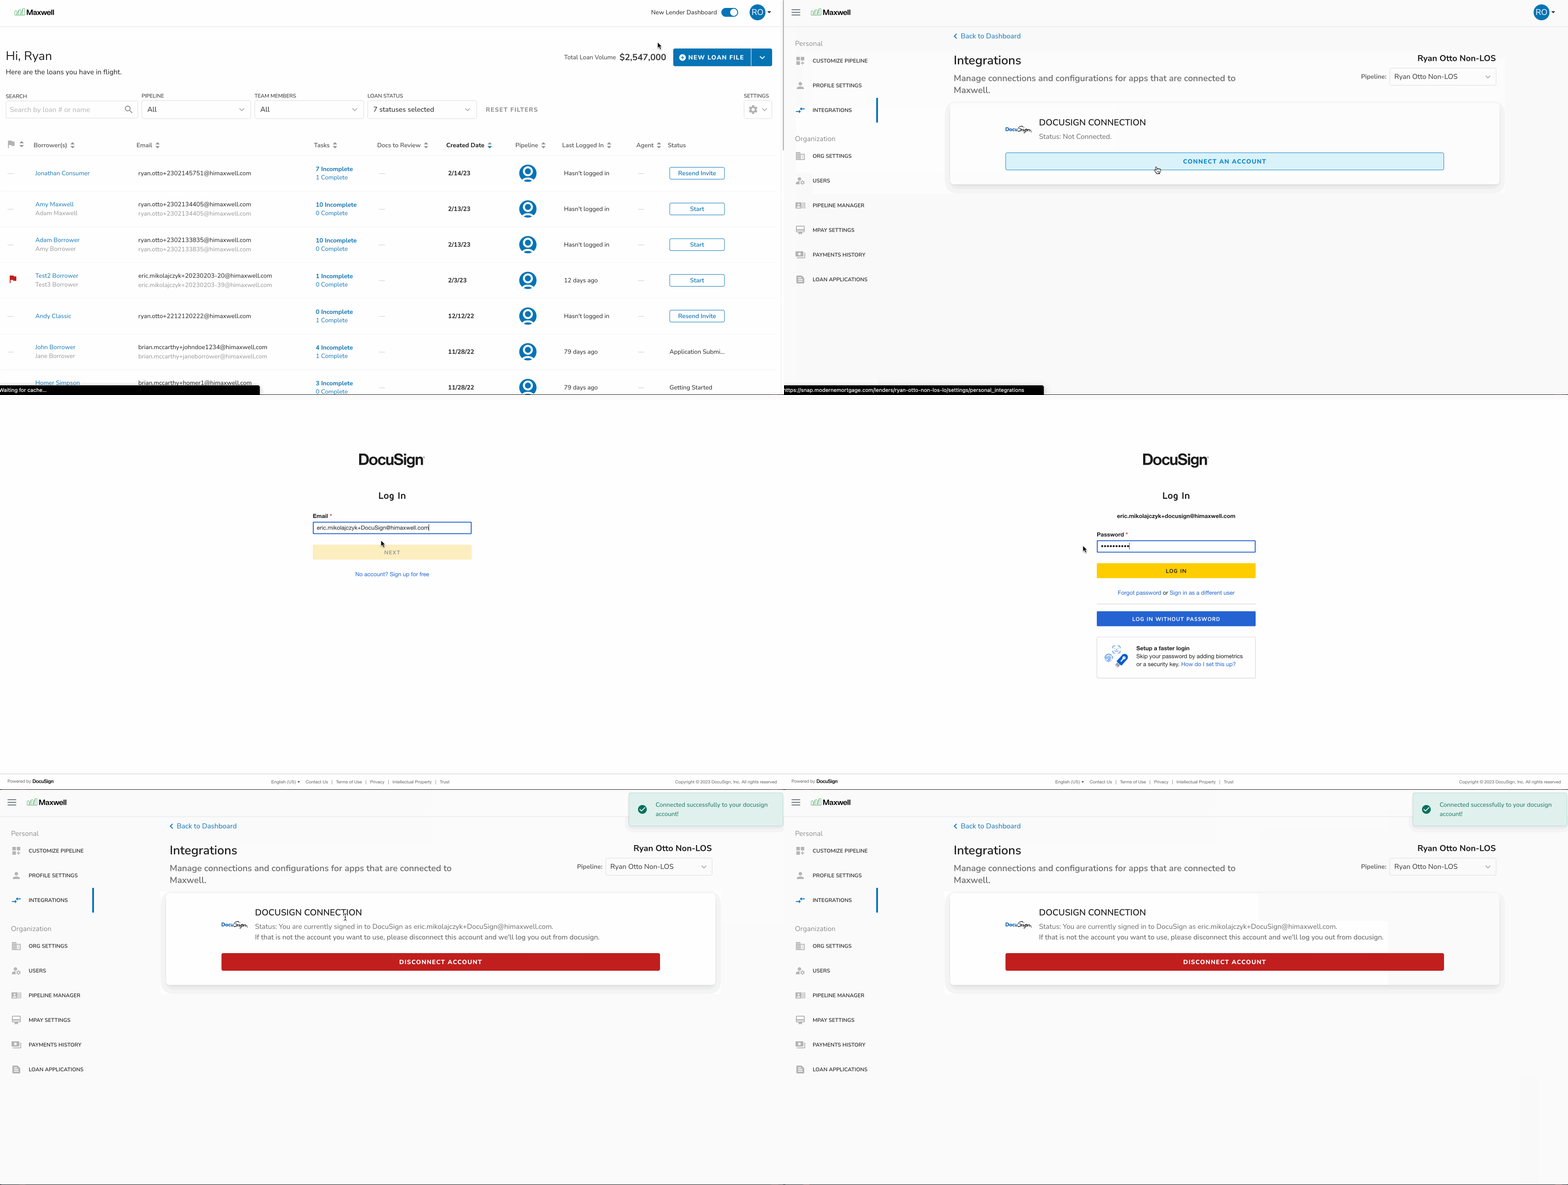
Connecting a DocuSign account to your pipeline can speed up the document collection and lets you create eSign tasks without leaving Maxwell. The DocuSign account must be connected by the Loan Officer (or a manager of a the LO's pipeline). After DocuSign is connected, any support role can use the Review & Sign functionality for that pipeline
How to Enable DocuSign
Enabling the DocuSign is quick and easy. You just need your DocuSign credentials.
- Navigate to your Settings Menu and click the Integrations tab
- Click the Connect an Account button (you will be brought to a DocuSign login screen)
- Enter your DocuSign Credentials
- Once your login is successful, you will be redirected back to Maxwell!

Create a DocuSign Task
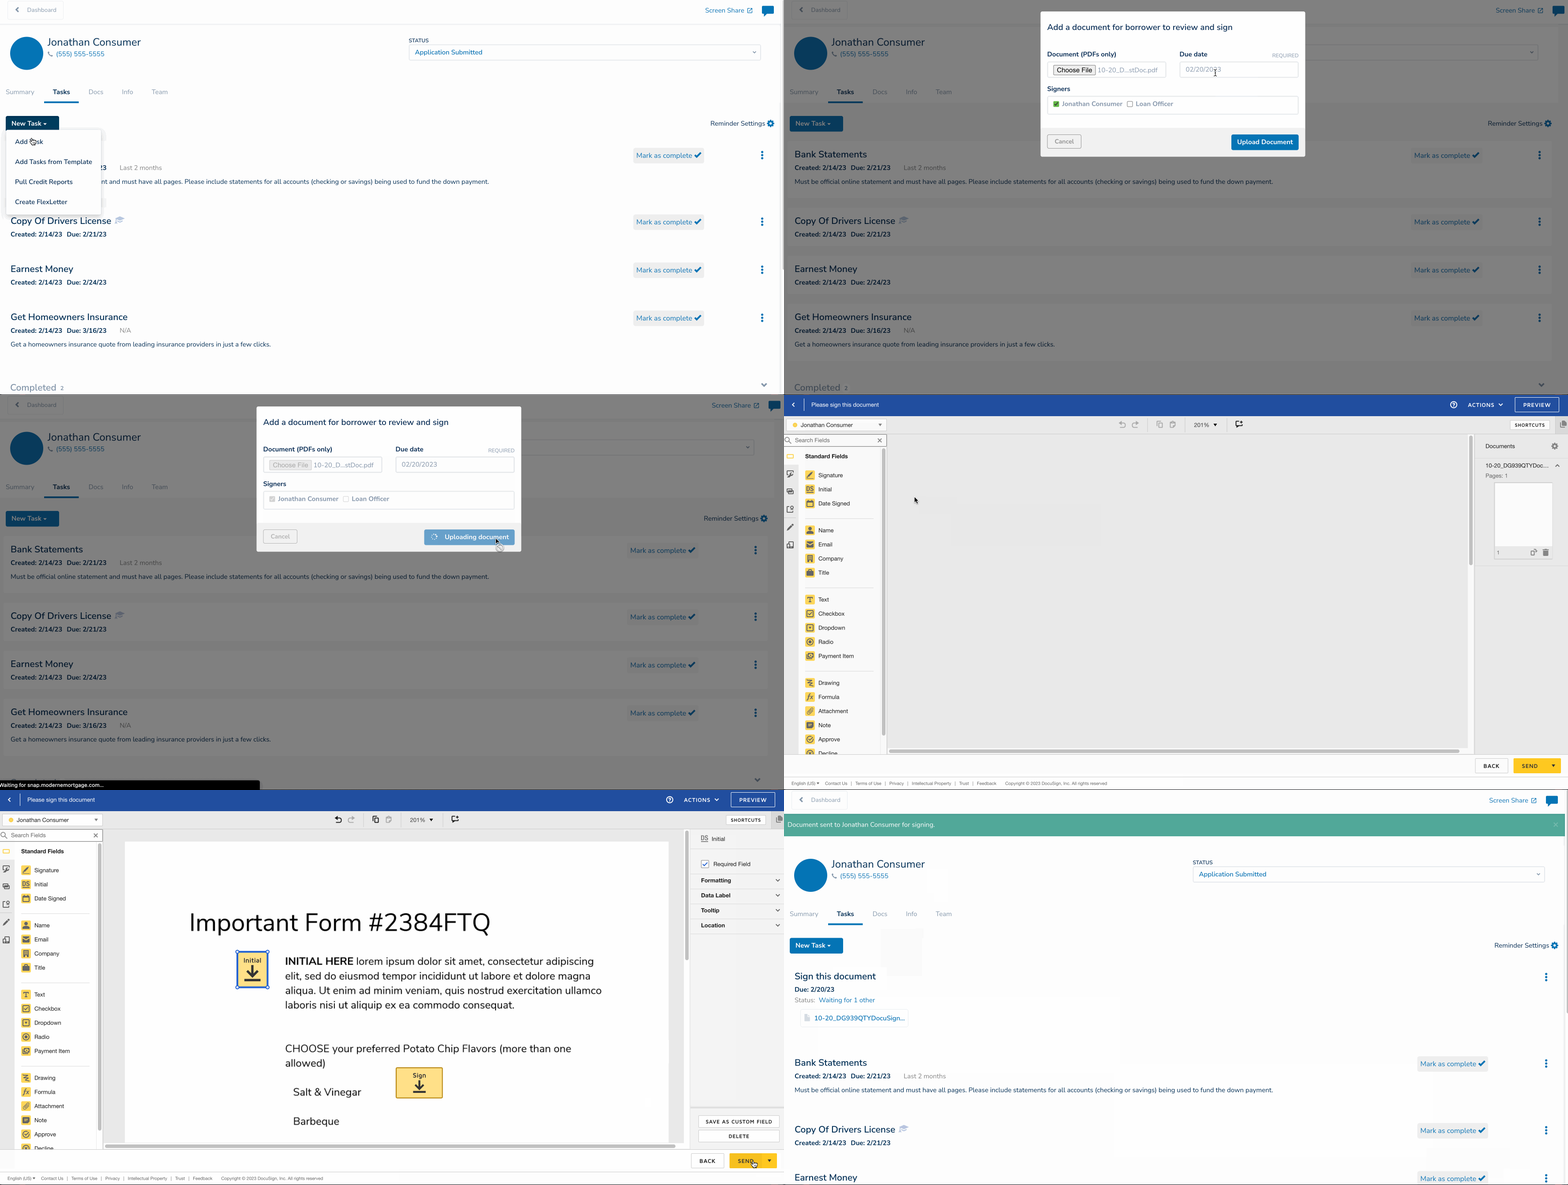
Now that your DocuSign account is connected, you will have a new task type: Review and Sign Document. Use the following steps to create a task
- Navigate to the Tasks tab and click New Task → Add Task
- Click the Review and Sign Document option
- Choose the document you would like to upload to DocuSign
- Select a Due Date and check the signers needed.
- Click the blue Upload button and wait while you are redirected to DocuSign
- Add fields needed to be signed
- Click the Send button in the bottom right hand when you're done. You'll be brought back to your borrower's loan file.

How to Disconnect DocuSign Account
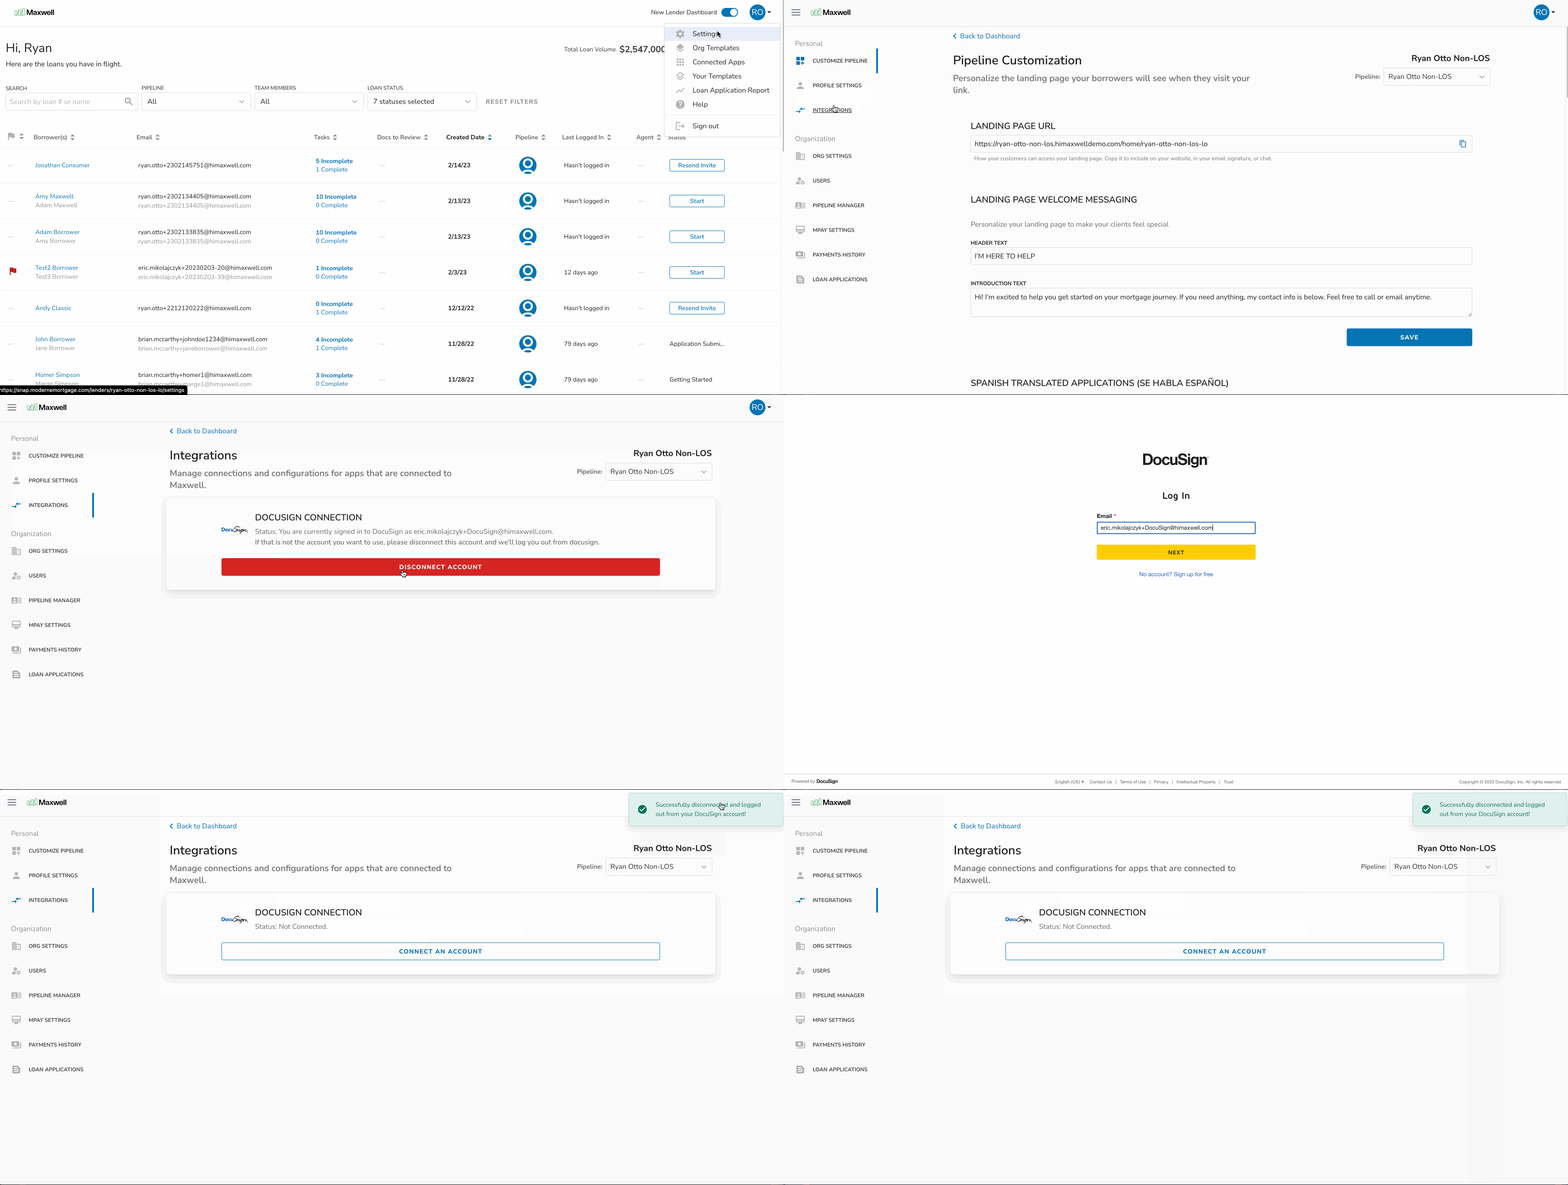
If you would like to disconnect your DocuSign account, the process is similar to connecting it!
- Navigate to your Settings menu and click the Integrations tab
- Click the red “Disconnect Account” button and that's it!
