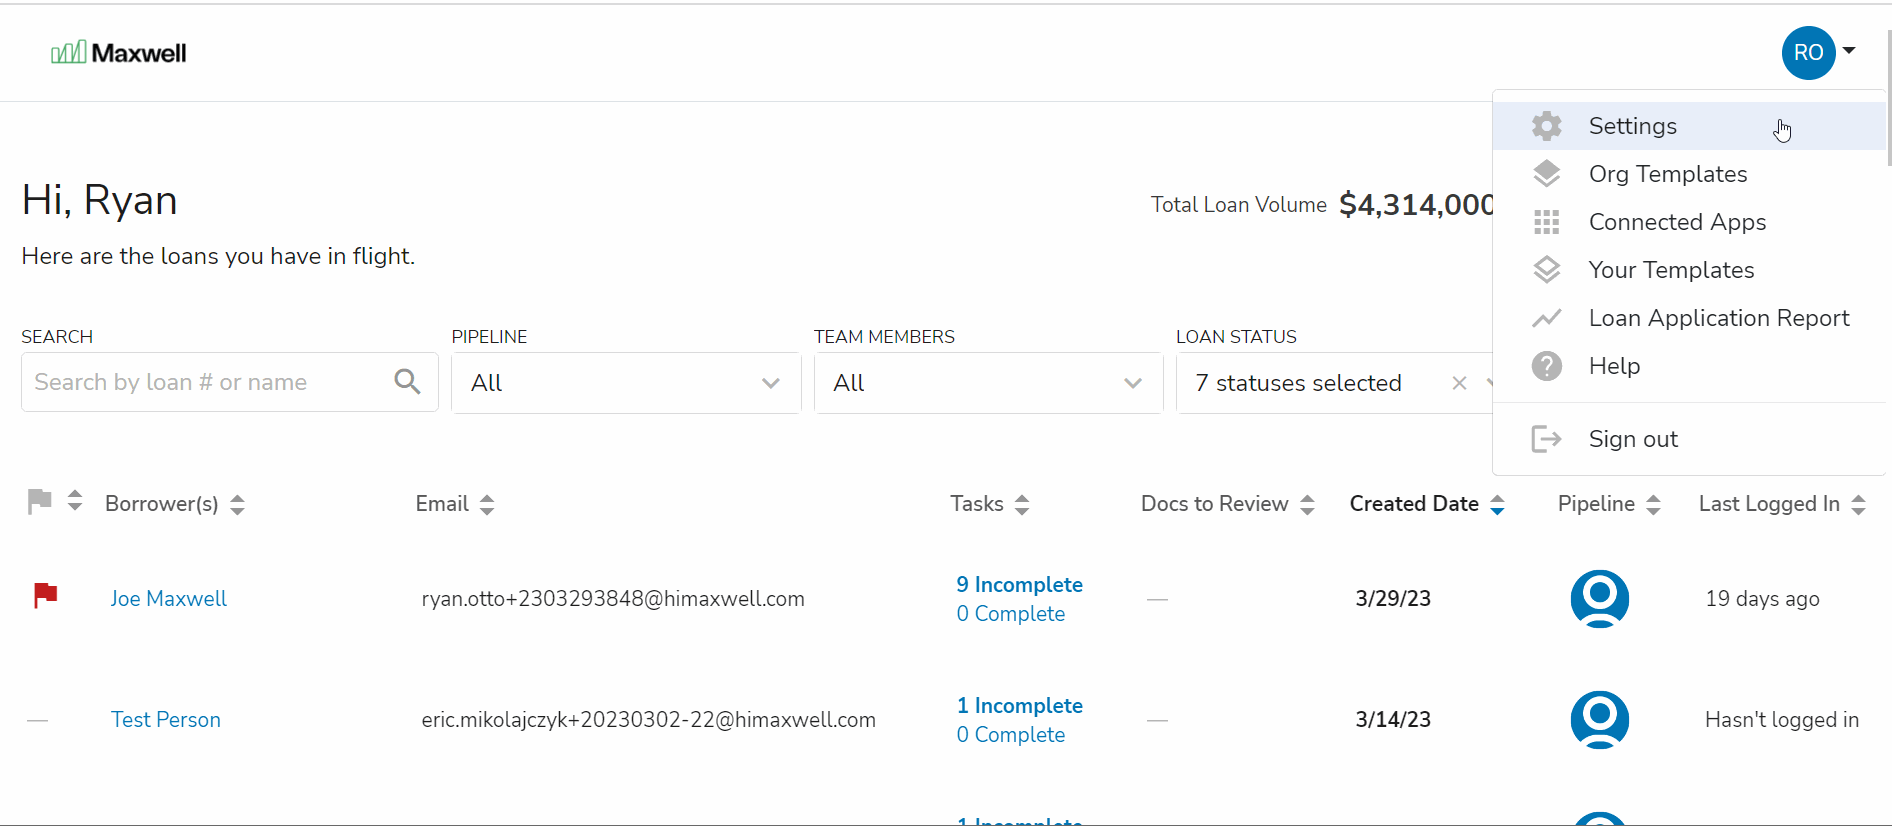
Pipeline Manager is an admin tool that allows you to add team members to loan officer pipelines, reassign files between pipelines, and permanently delete files. To get to Pipeline Manager, you need to go to Maxwell Settings. Click your initials/photo in the upper right corner, and choose Settings.
Add Team Members to a Pipeline
- Click Pipeline Manager in the left menu.
- Find the pipeline you want to modify. If it's in a child organization, use the drop down on the top right to select the correct branch. If you have a large number of branches, you can start typing once you click the dropdown to quickly search for your branch.
- Click the number of Users icon and then the Add User(s) to Pipeline button.
- Choose which LOAs, Processors, or Managers to add. You also need to choose whether you'd like them Assigned to All Files or Available for Assignment.
- Click the Add button. Once the screen refreshes you can see the team members that have access to that pipeline.
For more information about Lender Roles and Permissions in Maxwell click here.
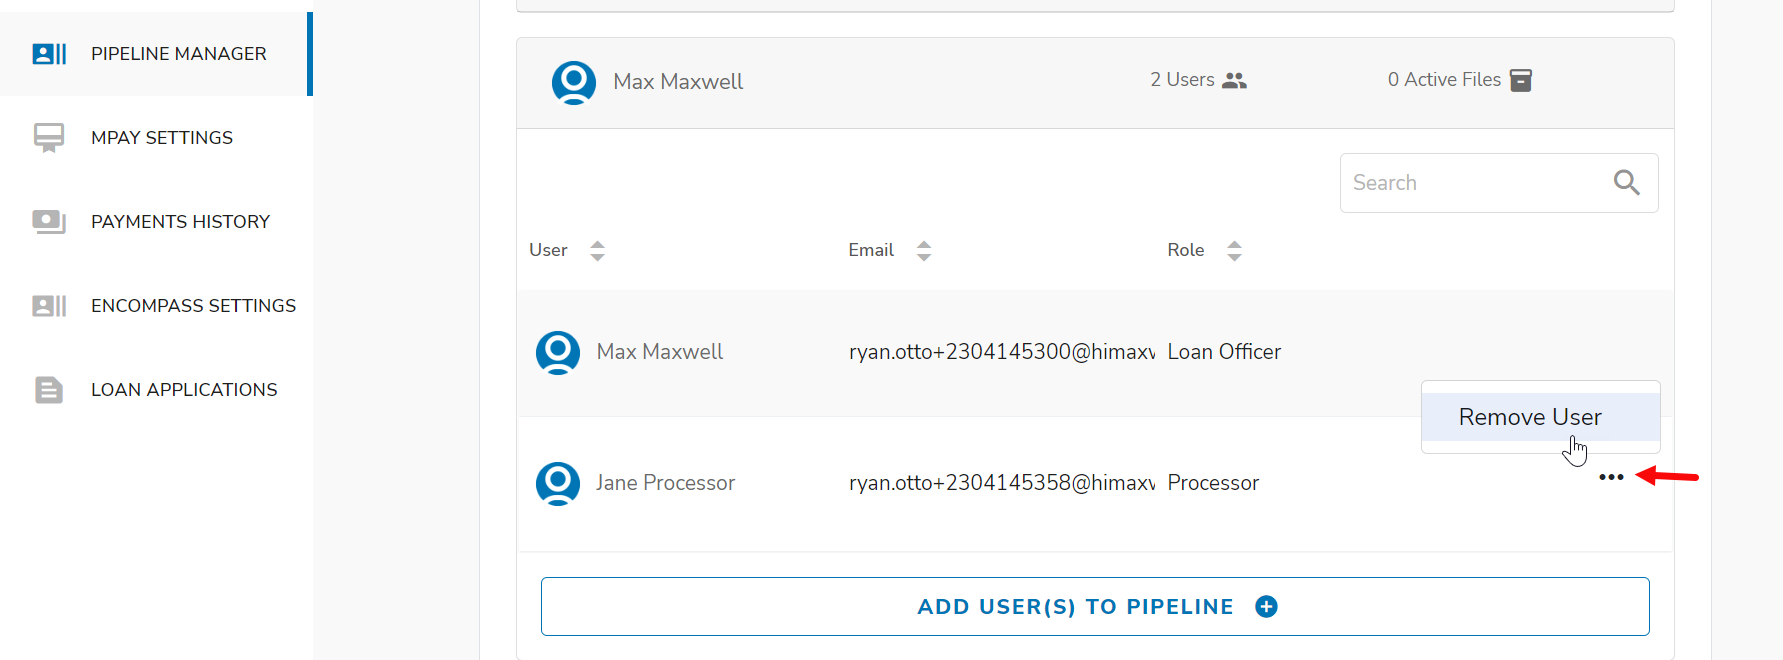
Remove a Team Member From a Pipeline
- Click Pipeline Manager in the left menu.
- Find the pipeline you want to modify. If it's in a child organization, use the drop down on the top right to select the correct branch. If you have a large number of branches, you can start typing once you click the dropdown to quickly search for your branch.
- Click the click number of Users icon to display all team members.
- Click the three dot menu by the team member you wish to remove from the team.
- Click Remove User.
Reassign Files Between Loan Officer Pipelines
- Click Pipeline Manager in the left menu.
- Find the pipeline where the loan(s) is currently. If it's in a child organization, use the drop down on the top right to select the correct branch. If you have a large number of branches, you can start typing once you click the dropdown to quickly search for your branch.
- Click the icon that displays the number of loan files.
- To Reassign the entire pipeline click “Reassign Pipeline” or check the box next to the loan files. The records can be sorted by Status and selected up to 10 per page.
- Click the Reassign Loan File(s) button & choose the destination pipeline.
- Click the Reassign button & the file(s) will be transferred.
Note: When reassigning a large pipeline it may take several minutes to complete the process. The job will be queued and complete if you would like to navigate away from this screen. You can check the progress of the transfer by refreshing the page and viewing how many files are left in the pipeline.
Permanently Delete Files
- Click Pipeline Manager in the left menu.
- Find the pipeline where the loan(s) is currently. If it's in a child organization, use the drop down on the top right to select the correct branch. If you have a large number of branches, you can start typing once you click the dropdown to quickly search for your branch.
- Look to the right & click the icon that displays the number of loan files.
- Put a checkmark next to the loan files you wish to delete. You may need to use the search box to find them.
- Click the trash can icon.
- Confirm by checking the box & clicking YES, DELETE FILE.