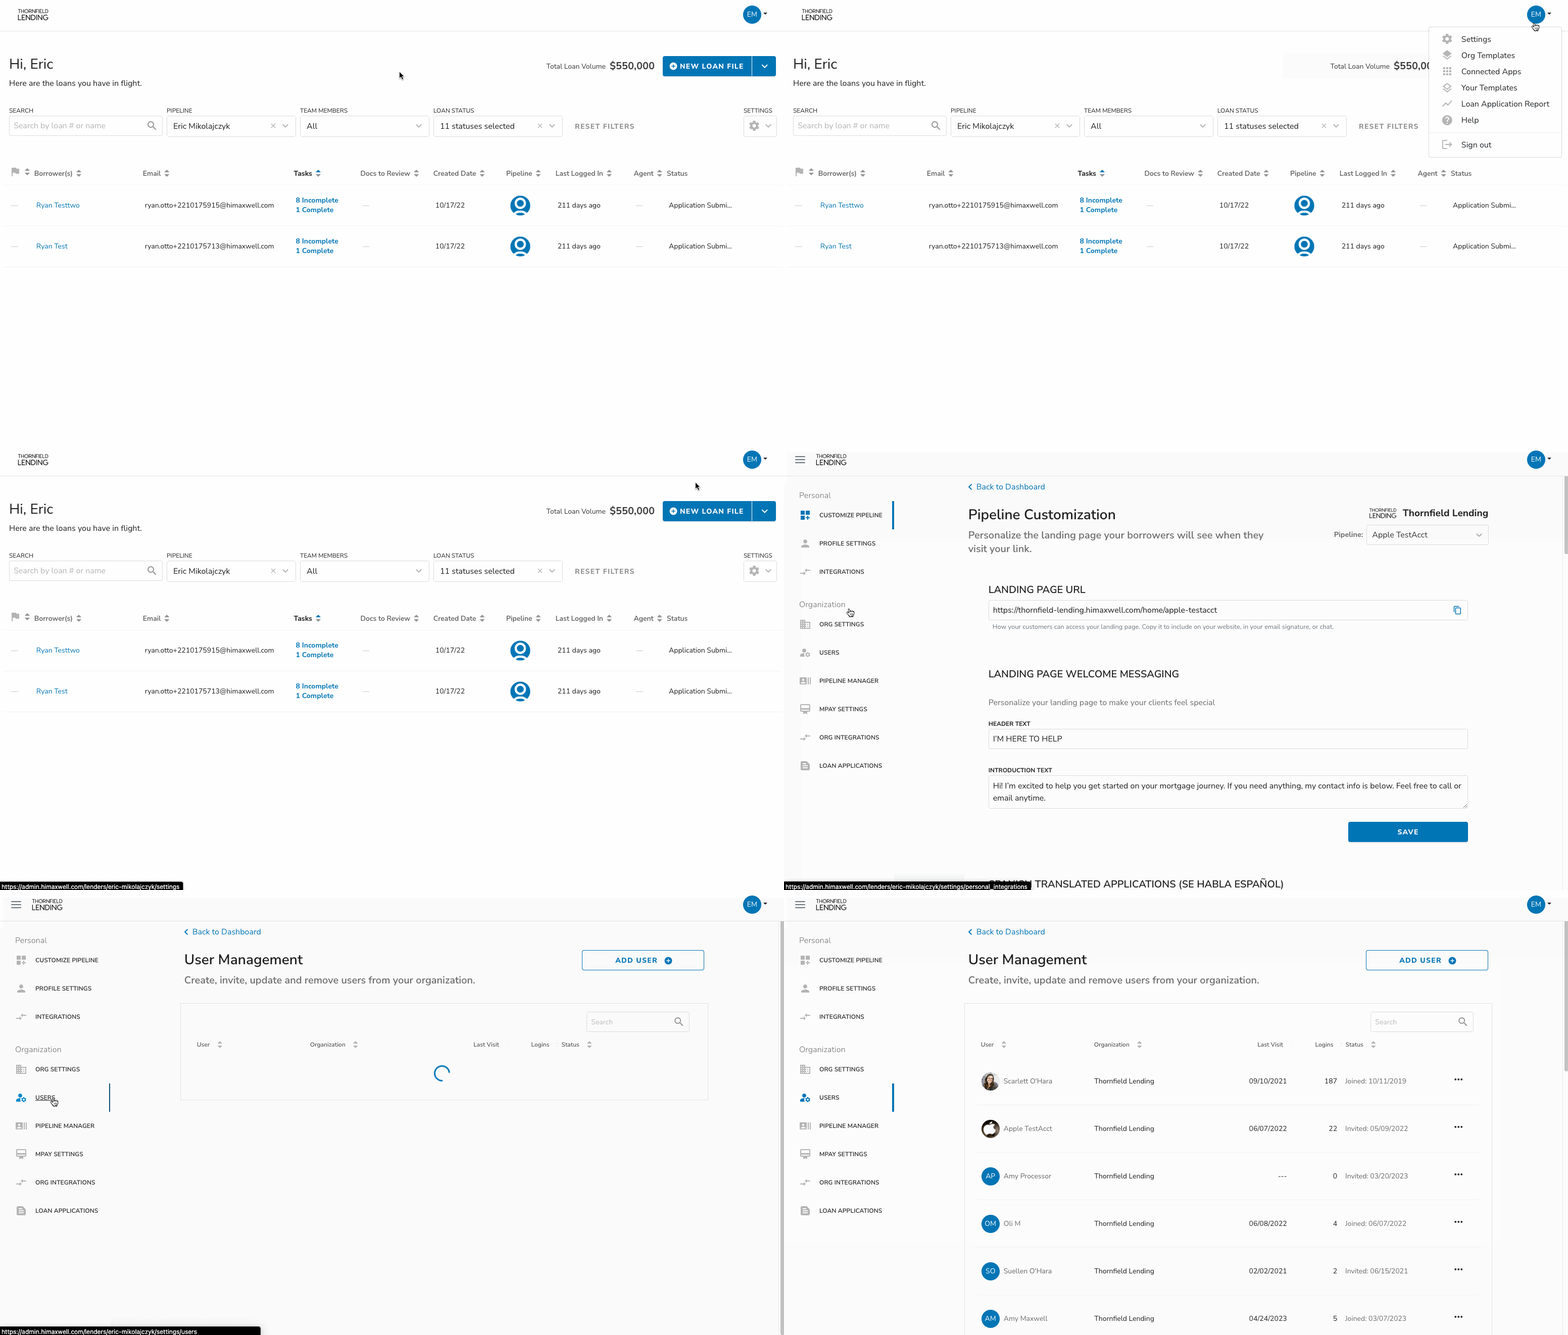
As an Org Admin in Maxwell, you have the ability to create users from the “Users” screen in your settings menu. During the creation process, you can also assign access to pipelines.
How to get to the User Management page:
- From the dashboard, click your profile picture (or your initials if no picture) in the top right hand corner.
- Click “Settings”
- On the left hand menu, click the “Users” option.

For more information on the different role types, click here
Create a Loan Officer (LO)
The loan officer role is the only role that can originate loans inside Maxwell.
Steps to create an LO:
- From the Users page, click the “Add User” button in the top right hand corner
- Enter their name and email
- If your Org has branches, select the branch the user's account and pipeline will be located.
- Select the Loan Officer role from the “Point of Sale Role” dropdown
- Enter their NMLS number (required field)
- Select “Invite Later” or “Create and Invite” to send the invitation right away.
Note: If the LO needs access to other pipelines, flip on the “Loan Officer is also a Manager” toggle then choose the pipelines they will be assigned to. Only branch pipelines will show up here. If they need to be assigned to outside of their branch, access can be given via Pipeline Manager. Click here for more info.
Create Support Roles (LOAs & Processors)
Loan Officer Assistants assist on LO pipelines, can create new loans for their LOs, and can be assigned to multiple LOs. Processors are similar to LOAs, but cannot create loan files.
When you assign access to LOAs and Processors, there are three types of access:
- Available for Assignment: Makes the LOA/Processor available to be assigned on individual loan files via the Team Tab
- Assign to All Files: Assigns the LOA/Processor to all current files and will auto-assign them to future files.
- LOS Auto Assignment: Our MeridianLink Mortgage & Encompass integrations can auto assign support roles based on assignments in your LOS. When your LOA/Processor is assigned in your LOS, they'll be able to view the file in Maxwell. If you'd like to use the auto assignment feature, skip steps 5 and 6 below.
Follow these steps to create a new support role:
- From the Users page, click the “Add User” button in the top right hand corner
- Enter their name and email
- If your Org has branches, select the branch the user's account will be located.
- Select the Loan Officer Assistant or Processor role from the “Point of Sale Role” dropdown
- Using the Pipelines dropdown, select which pipelines the LOA/Processor will need access to.
- Select “Assign to All Files” or “Available for Assignment” (see above for descriptions of these).
- Select “Invite Later” or “Create and Invite” to send the invitation right away.
Note: If an LOA (or processor) needs access to a pipeline outside of their current branch, the access must be given in Pipeline Manager once the account is created.
Create a Manager
Managers are auto-assigned to all files on a pipeline they are assigned, but are not visible to the borrower.
- From the Users page, click the “Add User” button in the top right hand corner
- Enter their name and email
- If your Org has branches, select the branch the user's account will be located.
- Select the Manager role from the “Point of Sale Role” dropdown
- Using the Pipelines dropdown, select which pipelines the Manager will need access to (Managers will be Assigned to All files by default).
- Select “Invite Later” or “Create and Invite” to send the invitation right away.
Remove a User
Deleting a user will remove all access. Any loan officer that is being deleted must have their files transferred out of thier pipeline first.
- From the Users page search the user you wish to delete.
- Click the three dots to the right of the user entry
- Click “Delete User”
- Check boxes as confirmation (If LO is being deleted, there will be a place for a target pipeline)
- Click Red button to confirm deletion.