Maxwell's integration with MeridianLink Mortgage (MLM) has the following features:
- When a borrower submits a Maxwell loan application, we can create a new MeridianLink Mortgage Lead or Loan file and import the loan app data
- We can sync borrower uploaded documents into MLM
- We map Maxwell loan statuses to values in MLM
- We can map processor & LOA assignments from MLM & provide those support roles access to the file in Maxwell
Setting up an MeridianLink Mortgage Integration
MLM integrations are typically set up with the assistance of an Implementation Manager (IM) when you're starting out with Maxwell. If you need to set up an MLM integration after you've been using Maxwell, reach out to your Customer Success Manager.
Here is a broad outlline of how we set up MLM integrations:
- Your IM will assist in configuring settings in MLM:
- White listing these IP addresses: 54.173.229.200, 54.175.230.252, 34.237.63.24, 162.246.185.133, 50.214.7.189
- Creating a MLM document folder called “UNCLASSIFIED” with the doc type “MAXWELL DOCUMENT”
- Creating an API user account to power the integration
- Enabling the Event integration
- Your IM will gather the following information:
- MLM to Maxwell loan status mapping
- MLM loan template selections for Leads/Loans and Purchase/Refi/Heloc
- Maxwell to MLM document upload behavior
- MLM Usernames for your Loan Officers
- Your IM will discuss loan syncing preferences
- Your IM will send test loans to MLM so you can verify the integration is set up successfully
Loan Status Mapping
Maxwell loan status are mapped to status date fields in MLM. Once we detect a date in an associated field, we'll we'll update the loan status in Maxwell to the mapped value. If you organization is using our loan status notifications, the borrower will receive an email when the loan status changes.
Here's an example of an MLM status mapping, with MLM status dates on the left and the corresponding Maxwell loan status on the right.
{
"Pre-Processing Date": "Initial Documents Provided",
"Appraisal Report Ordered Date": "Appraisal Ordered",
"Appraisal Report Received Date": "Appraisal Received",
"Submitted Date": "Submitted To Underwriting",
"Approved Date": "Conditionally Approved",
"Clear to Close Date": "Clear to Close",
"Docs Ordered Date": "Closing Disclosure Sent",
"Docs Out Date": "Documents Sent To Title",
"Funded Date": "Loan Closed"
}
Document Syncing
There are two different options for document syncing behavior in MLM. You can set up the integration so that documents uploaded by a borrower are immediately sent to MLM. You can also choose to restrict document to only those documents marked Approved in Maxwell--this lets your lenders control what docs appear in your LOS.
The documents will be synced to the Unclassified folder referred to above.
Syncing Loan Files to MLM
When a borrower or lender submits an application, that application will automatically sync to MLM as either a Lead or a Loan, depending on how the integration is configured for your organization. This setting applies to all landing page loan applications.
Add an Existing MLM Lead/Loan to a Maxwell
If you already have an existing file in MLM and you'd like to use Maxwell for document collection or other features, you can add an MLM Lead/Loan number to a Maxwell file. First, create a new file for the borrower (including tasks) and invite them to the platform (see this article for instructions).
Once you've created the file, click the “Add LendingQB Number” link below the borrower's name. Enter a valid loan number and click the Sync button. 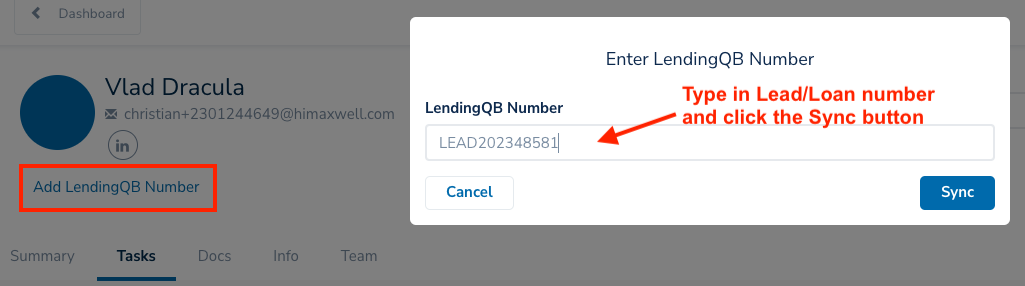
Note: If you have an existing MLM file, we assume you have all the application data you need. Our integration is designed to create new files from a loan application, not add loan application data to an existing file. We recommend you do not assign a loan app task when you already have an existing MLM file, as this could overwrite data in your LOS.