Features of the Encompass Integration
Maxwell uses ICE's API to integrate with your Encompass environment. Our integration has several features:
- When a borrower or lender submits a Maxwell loan application, we'll create a new Encompass file and import the loan application data.
- We can sync borrower-uploaded documents into the Encompass file.
- We map Maxwell loan statuses to Encompass milestones, so that when the milestone is completed we update the loan status in Maxwell.
- Borrowers can sign their disclosures inside the Maxwell environment--no need to sign into a different site.
- We can map processor & LOA assignments from Encompass and provide those support roles access to the file in Encompass.
- We can import new/existing Encompass files into Maxwell, manually or automatically.
Note: ICE API access requires that you have an active Developer Connect addendum with ICE. If your organization needs access to Developer Connect, reach out to your ICE contact.
Setting up an Encompass Integration
Encompass integrations are typically set up with the assistance of an Implementation Manager (IM) when you're starting out with Maxwell. If you need to set up an Encompass integration after you've been using Maxwell, reach out to your Customer Success Manager.
Here's a broad outline of how we set up Encompass integrations:
- Your IM will request an API key from ICE, and provide instructions for setting up an API user. More information can be found here.
- Your IM will meet with you to configure the core features of the integration:
- mapping Encompass milestones to Maxwell loan statuses
- mapping Encompass Loan Template Sets to Maxwell loan applications
- determining document upload behavior
- Your IM will assist you with setting up the Encompass Disclosures integration:
- configuring a single sign-on (SSO) connection in Developer Connect
- configuring a borrower portal widget in the ConsumerConnect Admin panel
- providing language for an ICE support ticket requesting activation of the SSO connection
- Your IM will send test loans to your Encompass instance so you can verify that the integration is set up successfully. This will require you to disclose on the test files.
Milestone Mapping
When Encompass milestones are mapped to Maxwell loan statuses, we'll monitor the Encompass file for milestone completion. Once a milestone is complete, we'll update the loan status in Maxwell to the mapped value. If you organization is using our loan status notifications, the borrower will receive an email when the loan status changes.
Here's an example of an Encompass milestone mapping, with milestones on the left and the corresponding Maxwell loan status on the right.
{
"Processing": "Initial Documents Provided",
"Submittal": "Submitted To Underwriting",
"Cond. Approval": "Conditionally Approved",
"Clear to Close": "Clear to Close",
"Docs Out": "Documents Sent To Title",
"Funding": "Loan Closed"
}
Note: There are a few Maxwell loan statuses, like Appraisal Ordered & Appraisal Received, that (typically) do not correspond to a specific milestone in Encompass. These loan statuses are not used for customers using the Encompass integration.
Document Syncing
There are three different options for document syncing behavior in Encompass. You can set up the integration so that documents uploaded by a borrower are immediately sent to Encompass. You can also choose to restrict document to only those documents marked Approved in Maxwell--this lets your lenders control what docs appear in your LOS.
By default, these documents are sent to the Unclassified section of File Manager in the eFolder. If you wish to sync borrower uploads to specific document groups in Encompass, we also offer an option that lets you map Maxwell tasks to specific Encompass document groups, and control the upload behavior for each task. Review this article to learn more.
Importing Encompass Loans to Maxwell
If your Encompass loans have not been disclosed, you can import them into Maxwell to provide your borrowers with a first-class experience where they can upload documents and sign disclosures. If you're importing an Encompass loan, we assume that you already have all the application data you need on a file--we cannot import a Maxwell loan application into an existing Encompass file.
Manual Import
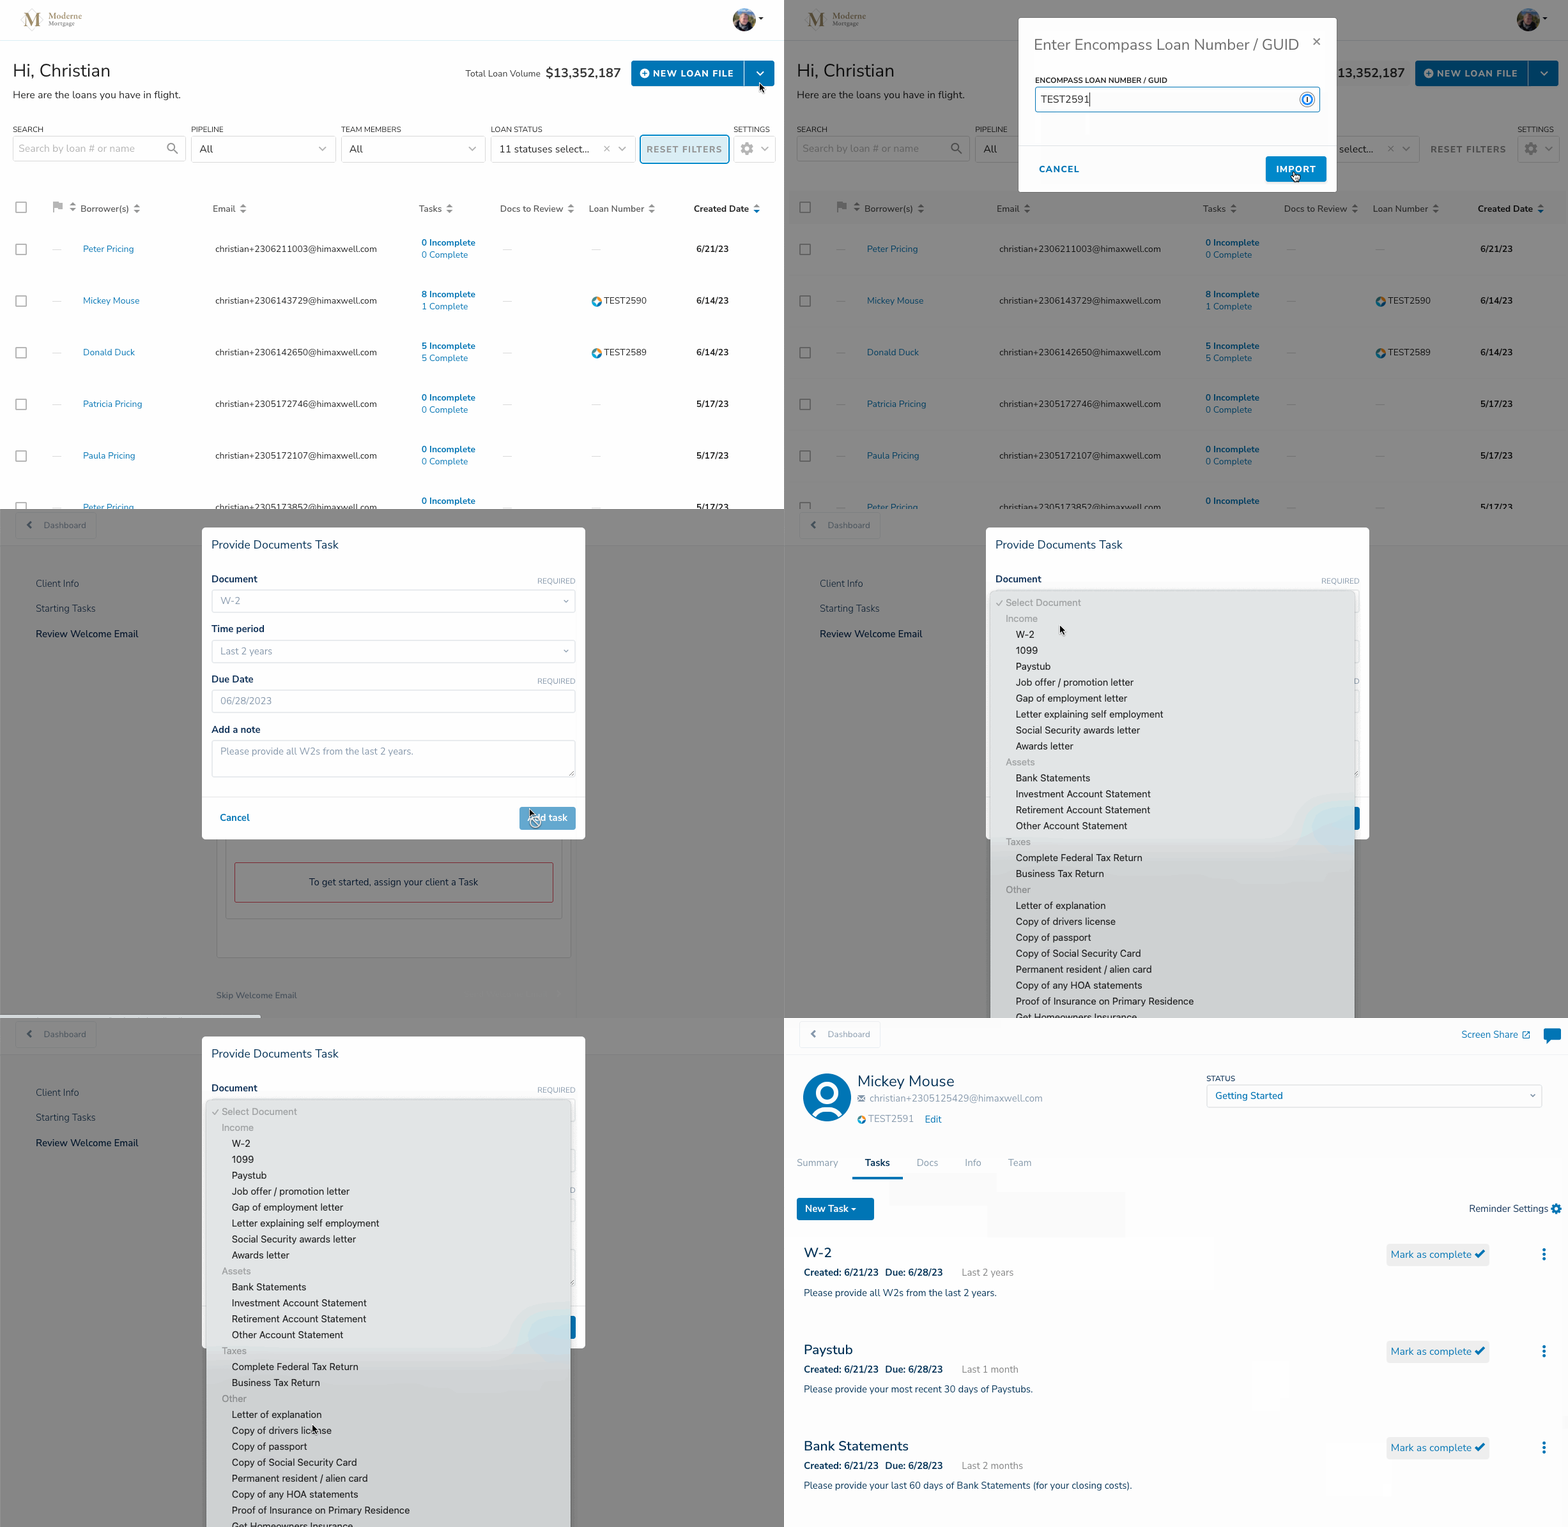
To manually import an Encompass file, click the arrow next to the New Loan File button on your dashboard and choose Import from Encompass. Enter the loan number and click the Import button. On the following screen you can add any tasks to the file & send the welcome email to the borrower.

Auto-Importing Loans from Encompass
As of April '23, lenders are able to enable "Auto-Import" from their Encompass environment. This option is available in Settings > Integration Settings:

When enabled:
- If a new loan was created in the SmartClient, we will automatically import it to the assigned Loan Officer's pipeline. We intentionally disregard loans created through Encompass Consumer Connect to avoid issues with Disclosures or interfering with the borrower experience.
- If an existing loan is assigned a new Loan Officer, we will automatically import it to the newly assigned Loan Officer's Pipeline.
- If an existing loan is reassigned from a Loan Officer that we already recognize to a new Loan Officer, we do not reassign the loan in the POS. It will remain in the pipeline of the first Loan Officer.